Friday, December 13, 2019

Easy Chocolate Fudge


My friend Marty strikes again with her easy, delicious chocolate fudge recipe!  Fudge can be a finicky candy, but not with this recipe.  No need for a thermometer and no worries about graininess or it being too sweet, either.  It's perfect. ❤️


Easy Chocolate Fudge

3 cups milk chocolate chips
1 (14 oz.) can sweetened condensed milk
1/8 tsp. salt
1 cup chopped pecans or walnuts
1 1/2 tsp. vanilla

Line an 8- or 9-inch square baking dish with parchment paper or wax paper leaving a slight overhang.  Combine chocolate chips with sweetened condensed milk and salt in a large microwaveable bowl.  Microwave at MEDIUM (50%) power for 3-5 minutes.  After one minute, stir mixture with a wooden spoon. (Mixture will be heavy.)  Continue to cook in 30-second increments stirring after each time until melted and smooth.  Stir in the pecans and vanilla.  Spread the fudge evenly in the lined pan with your hand.  Using an offset spatula or the back of a spoon, smooth top.  Mixture will appear very soft and shiny.  Refrigerate for 2 hours.  Lift fudge from pan using the overhang and set on a cutting board.  Remove parchment paper or wax paper and cut into 1-inch pieces.  Store in an airtight container in the refrigerator as this is a soft fudge.


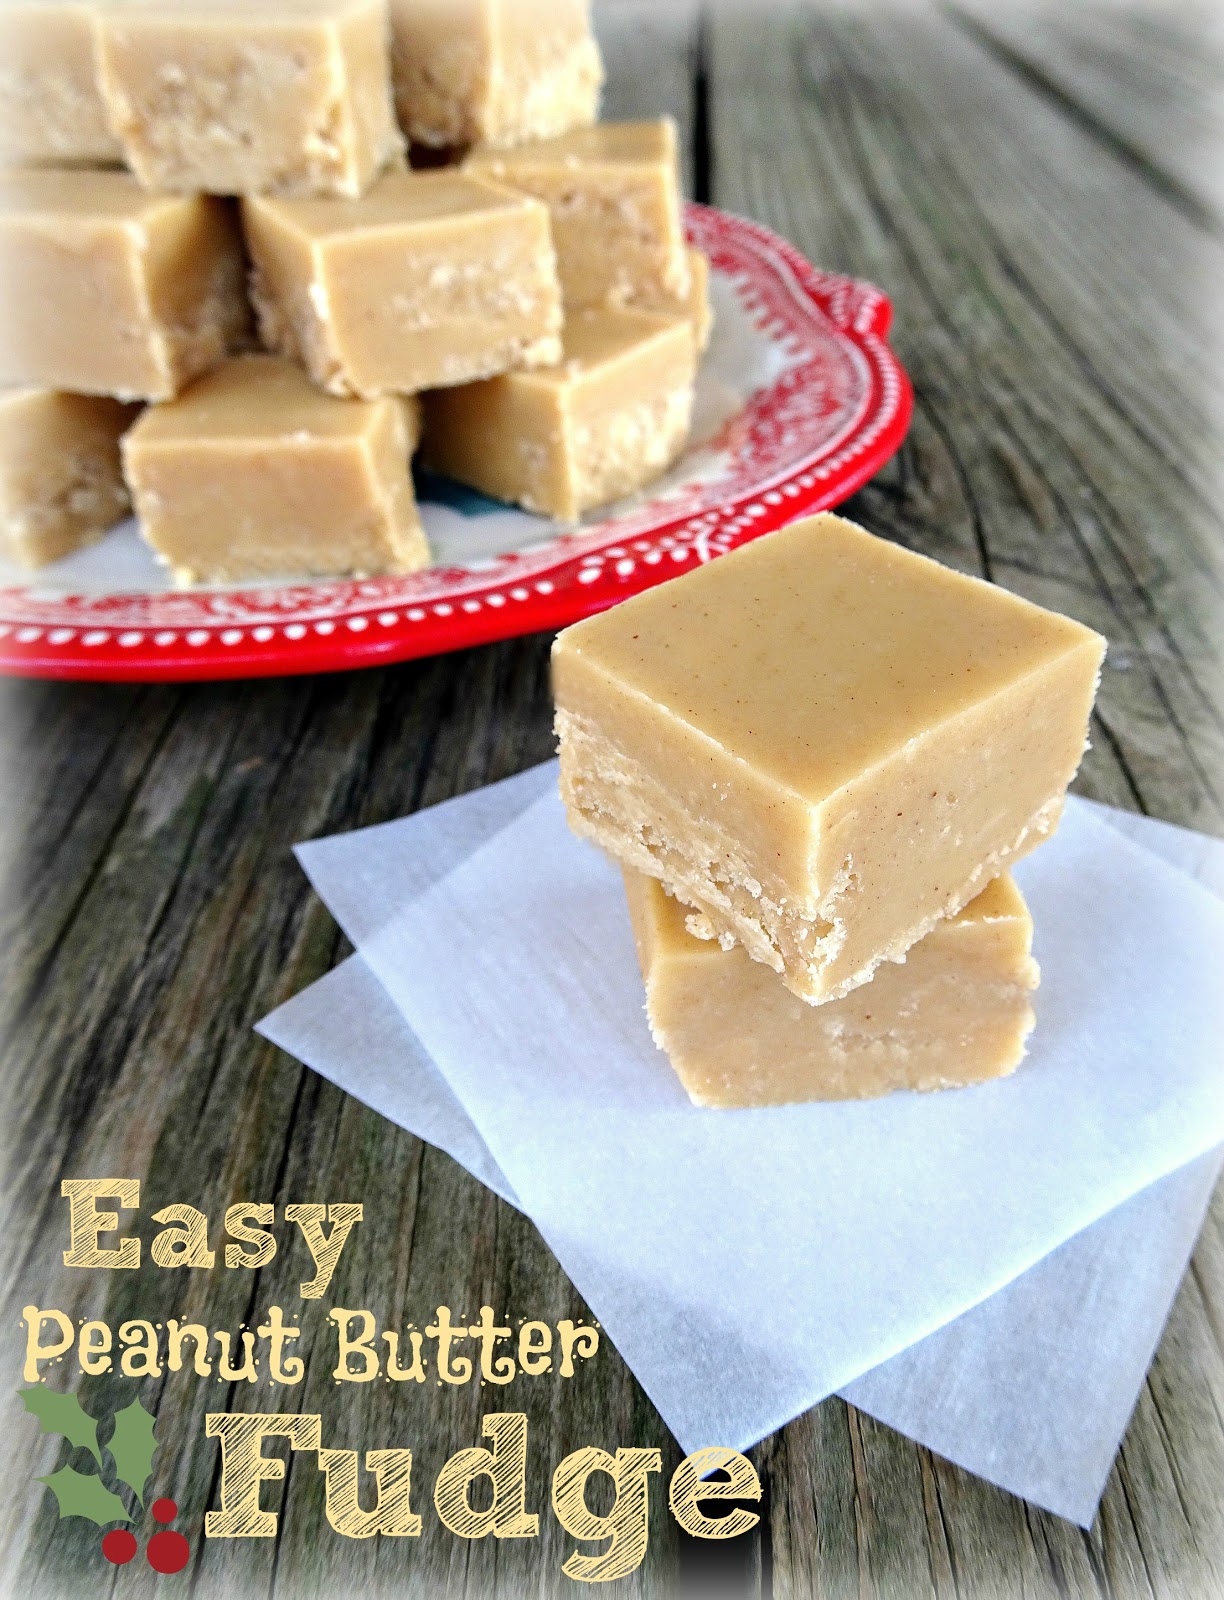
Note:  See the peanut butter fudge recipe for photos of the prepared pan:  http://www.easyaspiecanbe.com/2019/12/easy-peanut-butter-fudge-and-tutorial.html

Friday, December 6, 2019

Easy Peanut Butter Fudge and Tutorial


My friend Marty is an excellent cook.  When she told me that she had an easy peanut butter fudge recipe that called for only four ingredients, I had to try it, and wow!  It did not disappoint! Thanks, Marty! 


Easy Peanut Butter Fudge

1 cup (2 sticks) salted butter
1 cup smooth peanut butter (do not use natural peanut butter)
1 tsp. vanilla
4 cups powdered sugar, sifted

Line an 8- or 9-inch square baking dish with parchment paper or wax paper leaving a slight overhang.  Place the butter and peanut butter in a large microwaveable bowl.  Microwave on high in 30-second increments stirring after each time until melted and smooth.  Stir in the vanilla.  With a wooden spoon (mixture will become heavy), stir in the sifted powdered sugar one cup at a time.  Spread the fudge evenly in the lined pan with your hand.  Using an offset spatula or the back of a spoon, smooth top.  Mixture will appear very soft and shiny.  Refrigerate for 2 hours.  Lift fudge from pan using the overhang and set on a cutting board.  Remove parchment paper or wax paper and cut into 1-inch pieces.  Store in an airtight container at room temperature for up to one week.


Easy Peanut Butter Fudge 101:

Spread the fudge evenly in the lined pan with your hand.  Using an offset spatula or the back of a spoon, smooth top.  Mixture will appear very soft and shiny:


Lift fudge from pan using the overhang and set on a cutting board:


Enjoy!


Friday, November 22, 2019

Slow Cooker Green Bean Casserole


Slow Cooker Green Bean Casserole takes a classic holiday recipe and makes it even easier by utilizing your slow cooker to free up oven space.

Salt not pictured.

Slow Cooker Green Bean Casserole

4 (14.5 oz.) cans French style green beans, drained
2 (4 oz.) cans mushrooms, drained (optional)
2 (10 3/4 oz.) cans condensed cream of mushroom soup
1/4 tsp. black pepper
1 (6 oz.) can French fried onions, divided
Salt to taste

Combine green beans, mushrooms, soup, pepper, and 1 1/3 cups French fried onions in a 5- or 6-qt. slow cooker sprayed with cooking spray or lined with a liner if it's not nonstick.  Salt to taste.  Lay a sheet of paper towels across the top of the insert before putting on the lid to catch condensation.  (See photo below.)  Cook on low for 3 hours.  15 minutes before serving, heat remaining French fried onions in a nonstick skillet over medium-low heat stirring often for 10-12 minutes until toasted and fragrant.  Sprinkle over casserole.


Friday, November 15, 2019

Chicken Bake


This recipe for Chicken Bake has been around for a long time.  It is delicious, hot, and filling and is a perfect weeknight meal since it can be on your table in an hour.


Chicken Bake

1 pkg. (6 oz.) Stuffing Mix for Chicken
¼ cup butter, cut into pieces
1 ½ cups hot water
4 boneless skinless chicken breasts (about 1.5 pounds)
1 (10.5 oz.) can cream of mushroom soup, undiluted
1/3 cup milk or sour cream
 

Mix stuffing mix, butter pieces, and hot water in a large bowl just until moistened; let stand 5 minutes. Spray a 3-qt. shallow baking dish with non-stick cooking spray and place chicken in the middle of the baking dish. (I use an 8x12 baker.) Spoon stuffing around the edges. Mix soup and milk; pour over chicken. Bake at 375 for 35-40 minutes or until internal temperature reaches 165 degrees.

*For a variation, place some Swiss cheese over each breast before covering with the soup mixture.

Click here for printable format 

**Recipe adapted from backofthebox.com:  http://www.backofthebox.com/recipes/one-dish-meals/stove-top-one-dish-chicken-bake-g.html


Friday, November 1, 2019

Rootitoot Beef Stew


With a pressure cooker, you can whip up a hearty beef stew in half the time it takes on top of the stove.  This recipe is to-die-for and is comfort food at its finest...YUM!


Rootitoot Beef Stew

Yield:  4 generous servings
Approximate Total Time:  1 hour, 35 minutes using thawed stew meat

Ruth "Rootitoot" McCusker created this recipe so that it is perfect for everyone including beginners. The recipe can be found on Ruth’s website Rootitoot:  https://rootitoot.com/recipes-and-cooking/meats/beef-stew-(with-fresh-or-frozen-beef)/

Rootitoot Beef Stew 101:

*I halve the amount of brown sugar, vinegar, and pepper.

*To ensure tender beef, I increase the cook time to 30 minutes.

*I salt to taste before serving.

*I use a 6-qt pressure cooker and often increase the ingredients by 1.5 so that we have leftovers.  Approximate total time will increase to 1 hour, 50 minutes.

Click here to print!


Friday, October 25, 2019

Hamburger Pie


One day, my friend Irene mentioned that she was making Hamburger Pie, so I asked her for the recipe.  It is so good and easily made with pantry ingredients.  I've made it more times than I can count.  Thanks, Irene! 


Hamburger Pie

1 lb. ground beef (85/15 or leaner)
1 1/3 cups instant mashed potato flakes
1 egg, beaten
1 tsp. salt
1/8 tsp. pepper
1 tbsp. dried minced onion
1/4 cup ketchup
1 cup milk
4 servings of prepared instant mashed potatoes
Shredded cheddar cheese
1 packet brown gravy mix

Heat oven to 350 degrees.  Mix ground beef, instant mashed potato flakes, egg, salt,  pepper, dried minced onion, ketchup, and milk.  Pat into an ungreased pie plate.  Bake uncovered for 35-40 minutes.  5 minutes before the meat mixture is done, prepare 4 servings of instant mashed potatoes according to package instructions.  Top pie with prepared mashed potatoes and sprinkle with cheese.  Bake 3-4 minutes or until cheese melts.  While cheese is melting, prepare the brown gravy mix according to package instructions.   Top each slice of pie with desired amount of gravy.


This recipe was shared with me by my friend Irene who received it from her friend Mary.  

Friday, October 4, 2019

Air Fryer Dilled Salmon Patties


Want crispy, hot, savory salmon patties without the mess of pan frying with oil?  Use your air fryer!  

Onion not shown.

Air Fryer Dilled Salmon Patties

1 (14.75 oz.) can salmon
2 tbsp. butter
1/2 cup chopped onion
1/2 cup fine dry bread crumbs plus additional crumbs for coating
2 eggs, beaten
1 tsp. dried dill weed
1/2 tsp. dried mustard
1/4 tsp. salt
1/4 tsp. pepper

Drain salmon.  Discard bones and skin from salmon; flake meat.  In a 5 qt. saute pan or Dutch oven, melt butter over medium heat and cook onion in butter until tender but not brown.  Remove from heat.  Add 1/2 cup bread crumbs, beaten eggs, dill weed, dried mustard, salt, pepper, and flaked salmon; mix well.  Shape into 4 patties and place on a baking sheet.  Patties will be very loose.  If they start to fall apart, just reshape.  Add a generous amount of fine dry bread crumbs to a shallow bowl like a pie plate.  Coat patties on all sides and place back on the baking sheet.

Spray the bottom of your air fryer basket with oil to prevent the patties from sticking.  Place 2-4 patties (quantity depends on the diameter of your air fryer basket) in the basket and spray the tops with oil.  Set temperature to 400 degrees and air fry for 6-10 minutes until desired brownness. Turn patties, spray tops with oil, and air fry for 5-6 minutes more.  Serve with Lemon Sauce (recipe link below) for a mouth-watering main dish.

Click here for printable format

I highly recommend serving the salmon patties with this recipe for Lemon Sauce:  http://www.easyaspiecanbe.com/2019/10/lemon-sauce.html

Thursday, October 3, 2019

Lemon Sauce


Lemon Sauce is a light, delicious sauce for any type of fish especially salmon patties!


Lemon Sauce

Taste of Home has been around for a long time, and there's a reason why!  All the recipes are tested in a test kitchen and feature common ingredients found in most grocery stores.  You can find the Lemon Sauce recipe as part of the Lemony Salmon Patties recipe on the Taste of Home website:  https://www.tasteofhome.com/recipes/lemony-salmon-patties/?cpi=16  

Wednesday, September 25, 2019

Perfect Pressure Cooker Brown Rice


Brown rice comes out perfectly in the pressure cooker.  Just set it and forget it!

Butter not shown.

Perfect Pressure Cooker Brown Rice

Yield:  6 cups
Approximate Total Time:  55 minutes 
Electric Pressure Cooker Size:  6 quarts

2 cups long grain brown rice
2 1/2 cups water
1 tsp. Kosher salt*
1 Tbsp. butter*

Measure rice into a 2-qt. bowl and cover with cold water.  Swish with your fingers to remove starch.  Drain, and continue rinsing the rice using this process until the water is clear.  Drain. Place all ingredients into the pressure cooker pot; stir.  Lock the pressure cooker lid in place and set steam vent to Sealing. Select PRESSURE COOK (Manual) and cook for 24 minutes on High pressure.  Once the 24-minute cooking cycle is complete, select CANCEL or unplug the unit. (This will turn off the pressure cooker as any extra heat can cause the rice to stick.) Allow the pressure to release naturally, which will take about 15 minutes. Remove lid, fluff with fork, and serve.

*Salt and butter are optional or can be adjusted as desired.

Note: Use a standard dry measuring cup for the rice and a glass liquid measuring cup for the water.

Friday, September 20, 2019

Crock Pot Chicken and Dumplings and Tutorial


Comfort food perfection!  Thick, chewy dumplings, tender chicken, and a full-flavored, rich broth are only a slow cooker meal away.  

Celery is called for in the recipe, but I don't use it.

Crock Pot Chicken and Dumplings

Brandie of The Country Cook has many delicious, easy recipes.  The recipe and video for Crock Pot Chicken and Dumplings can be found on Brandie's website The Country Cook:   https://www.thecountrycook.net/crock-pot-chicken-and-dumplings/ 

Crock Pot Chicken and Dumplings 101:

1)  I do not recommend frozen breasts for this recipe.  The USDA recommends using thawed meat in a slow cooker because of the potential hazard of bacteria growing.  https://www.realsimple.com/food-recipes/cooking-tips-techniques/usda-frozen-meat-poultry-slow-cooker

2)  I use 1 tsp. of garlic salt, 1/4 tsp. pepper, and Pillsbury Grands Southern Recipe Southern Homestyle Biscuits.

3)  I recommend a longer cooking time of 6-8 hours on low or until chicken reaches 165 degrees. 

4)  If needed, salt to taste before serving.

Click here to print!

Photos of process:  Flatten each biscuit with the palm of your hand. Cut the biscuits into strips, and then cut down the center:


Put the flour into a bowl, place slices of biscuits into the flour, and toss to coat well:


Drop the coated biscuit slices one by one into the slow cooker. Doing this one at a time will keep them from sticking together when you drop them in, and the flour will thicken the broth. Take a spoon and gently push the biscuits down under the broth so the tops are moistened. Do NOT stir:


Enjoy!


Thursday, September 19, 2019

Pressure Cooker Long Grain White Rice


Long grain white rice is SO easy in the pressure cooker!  And you can easily adjust the firmness to your preference!


Pressure Cooker Long Grain White Rice

Yield:  6 cups
Approximate Total Time:  35 minutes 
Electric Pressure Cooker Size:  6 quarts

2 cups long grain white rice
2 1/4 cups water
1 tsp. salt*
1 tbsp. butter*

Measure rice into a 2-qt. bowl and cover with cold water.  Swish with your fingers to remove starch.  Drain, and continue rinsing the rice using this process until the water is clear.  Drain.  Combine all ingredients in the pressure cooker pot.  Lock the pressure cooker lid in place and set steam vent to Sealing. Select the RICE button and adjust (if needed) so it's on the "Normal" setting. If your pressure cooker does not have a rice button, select PRESSURE COOK (Manual) and cook for 12 minutes on LOW pressure.  

Once the 12-minute cooking cycle is complete, select CANCEL or unplug the unit. (This will turn off the pressure cooker as any extra heat can cause the rice to stick.) Allow the pressure to release naturally, which will take about 6 minutes. Remove lid, fluff with fork, and serve.

*Salt and butter are optional or can be adjusted as desired.

Note: Use a standard dry measuring cup for the rice and a glass liquid measuring cup for the water.

Rice firmness:

*Al Dente (firmer) texture: Decrease water to 2 cups. Everything else will stay the same. This will yield about 5 cups of rice.

*Softer texture: Increase water to 2 1/2 cups. Everything else will stay the same. This will yield about 6 cups of rice.

Click here for printable format

Friday, September 13, 2019

Easy Long Grain Rice


Want perfect long grain rice every time?  Use your microwave!

1 1/2 cups water shown for a firmer rice texture.


Easy Long Grain Rice

1 cup uncooked long grain rice
1 3/4 cups hot water**
1/2 tsp. salt*
1 Tbsp. butter*

Measure rice into a 2-qt. bowl and cover with cold water.  Swish with your fingers to remove starch.  Drain, and continue rinsing the rice using this process until the water is clear.  Drain.  Combine all ingredients in the 2-qt. bowl.  Cover with plastic wrap and vent by turning back one edge at the side of the bowl to form a narrow slot where excess steam can escape.  Microwave at High (100%) for 5 minutes.  Reduce power to Medium (50%).  Microwave until liquid is absorbed and rice is tender, 10-13 minutes.  Fluff with fork before serving.
Yield:  about 3 cups cooked rice

*Salt and butter are optional or can be adjusted as desired.

**Rice firmness:

Al Dente (firmer) texture: Decrease water to 1 1/2 cups. Everything else will stay the same.


Friday, September 6, 2019

Pressure Cooker Egg Bites


Everyone is raving about the Sous Vide Egg Bites available at Starbucks.  At almost $5 for two, did you know you can make several for a fraction of the cost using your pressure cooker?  Yup, and you can use whatever ingredients you want!


Pressure Cooker Egg Bites

Yield:  7 but varies depending on ingredient quantities
Approximate Total Time:  45 minutes

Ruth "Rootitoot" McCusker created this recipe so that it is perfect for everyone including beginners. You can find the recipe on Ruth's website:  https://rootitoot.com/recipes-and-cooking/breakfast-breads-and-sandwiches/egg-bites/

Egg Bites 101:

*I use a 6-qt. pressure cooker.

*I used pre-shredded extra sharp cheddar cheese and packaged real bacon bits in the version pictured, and they couldn't have been yummier--or easier!

*Egg bite molds can be purchased several places like Amazon, Kohl's, etc.  I got mine at Kohl's:  https://www.kohls.com/product/prd-3369230/food-network-pressure-cooker-accessory-silicone-egg-bites-with-lid.jsp?prdPV=1

*Once the pressure cooker lid is removed, allow egg bites to rest for 1-2 minutes to settle.  Then remove from pressure cooker, flip onto a plate, and let rest for 5-10 minutes so moisture can evaporate.

*Recipe can be doubled and two egg bite molds can be used:

Two egg bite molds before cooking.
Egg bites right after lid is removed.

Friday, August 23, 2019

Chicken & Rice for Dogs and Tutorial


A bland diet of chicken and rice is sometimes prescribed for dogs when they have upset stomachs.  The easiest, most perfect way to make both at the same time is in the pressure cooker.


Chicken & Rice for Dogs

Yield:  varies
Approximate Total Time:  1 hour
Electric Pressure Cooker Size:  6 quarts

2-4 boneless, skinless chicken breasts, fresh or frozen
1 cup uncooked long grain rice, rinsed*
1 cup water*

Pour 1.5 cups of water into the pressure cooker pot. Place the desired amount of chicken breasts into the pot. They can be fresh or frozen but need to be placed in one layer. Place a trivet over the top of the chicken. Ideally, the legs of the trivet should rest on the pot, not on top of the chicken, so shimmy it around until it feels right.

In a 1.5 qt. heatproof bowl**, combine 1 cup rinsed white rice with 1 cup water. It's very important to rinse the rice to reduce stickiness. Place the bowl on top of the trivet.  Lock the pressure cooker lid in place and set steam vent to Sealing. Select PRESSURE COOK (Manual) and cook for 22 minutes on High pressure.  Once the 22-minute cooking cycle is complete, allow the pressure to release naturally.

Remove lid.  Remove bowl of rice and fluff with a fork.  Remove chicken from pot and shred. Once cooled, serve according to the ratio and frequency recommended by your veterinarian.

Click here for printable format

*If more rice is desired, increase the rinsed rice to two cups and the water to two cups.  No change in time or size of bowl is needed.

**Because of the high pressure, I recommend a stainless steel bowl for PIP (pot-in-pot) cooking.  This is the one I use:  https://www.amazon.com/Tovolo-Stainless-Steel-Mixing-Quart/dp/B001C0B02E/ref=sr_1_3?ie=UTF8&qid=1539612149&sr=8-3&keywords=1.5+qt+stainless+steel+bowl

Chicken & Rice for Dogs 101:

Pour 1.5 cups of water into the pressure cooker pot. Place the desired amount of chicken breasts into the pot. They can be fresh or frozen but need to be placed in one layer. Place a trivet over the top of the chicken. Ideally, the legs of the trivet should rest on the pot, not on top of the chicken, so shimmy it around until it feels right.

In a 1.5 qt. heatproof bowl, combine 1 cup rinsed white rice with 1 cup water. It's very important to rinse the rice to reduce stickiness. Place the bowl on top of the trivet: 


Remove lid.  Look how perfectly the rice cooked!


Remove bowl of rice and fluff with a fork.  Remove chicken from pot and shred. Once cooled, serve according to the ratio and frequency recommended by your veterinarian.


Friday, August 9, 2019

Pressure Cooker Rice Pudding


Whether served warm or chilled, this is the creamiest, easiest rice pudding you'll ever make.


Pressure Cooker Rice Pudding

Yield:  8 servings
Approximate Total Time:  30 minutes plus chilling time
Electric Pressure Cooker Size:  6 quarts

One of my favorite pressure cooker recipe authors is Barbara Schieving.  Author of several cookbooks, she also has a blog called Pressure Cooking Today, which is where the recipe and video for Pressure Cooker Rice Pudding can be found: https://www.pressurecookingtoday.com/the-best-pressure-cooker-rice-pudding/