Friday, March 6, 2020

Pressure Cooker Corned Beef and Cabbage


I adapted my favorite oven-baked corned beef and cabbage recipe to the pressure cooker.  The result?  One hour shaved off the total time, less shrinkage of the corned beef, no heating up of the kitchen...but yet still immensely delicious!


Pressure Cooker Corned Beef and Cabbage

Yield:  4-6 servings
Approximate Total Time:  3 hours
Electric Pressure Cooker Size:  6 quarts

1 (around 4 lbs.) flat cut corned beef brisket
1 1/2 cups beef broth, beer, or dry white wine
1 medium yellow onion, sliced
Red potatoes (slightly less than 1/2 of a 5 lb. bag--about 2 pounds)
Small head of cabbage
2-3 cups baby carrots 
Butter, melted
Freshly ground black pepper

Unwrap the brisket, set spice packet aside, and rinse the brisket with cool water.  Pat dry.  Trim as much fat as you can from the brisket, and rub the seasonings from the spice packet all over the meat.  Set aside.  Pour the beef broth or other liquid into the pressure cooker pot and add the onion.  Place the trivet on top of the onions, and put the corned beef on the trivet.  The brisket may curve up along the inside of the pot.  (See photos below.)

Lock the pressure cooker lid in place and set steam vent to Sealing.  Select PRESSURE COOK (Manual) and cook for 90 minutes on High pressure. When the cook time ends, let the pressure release naturally. During this time, prepare the vegetables. Cut the potatoes in fourths (or sixths if large).  Cut the head of cabbage into quarters.  Then cut each fourth in half to create 8 thin wedges.  Leave the core intact as it helps hold the wedges together.  When the valve drops, remove lid.

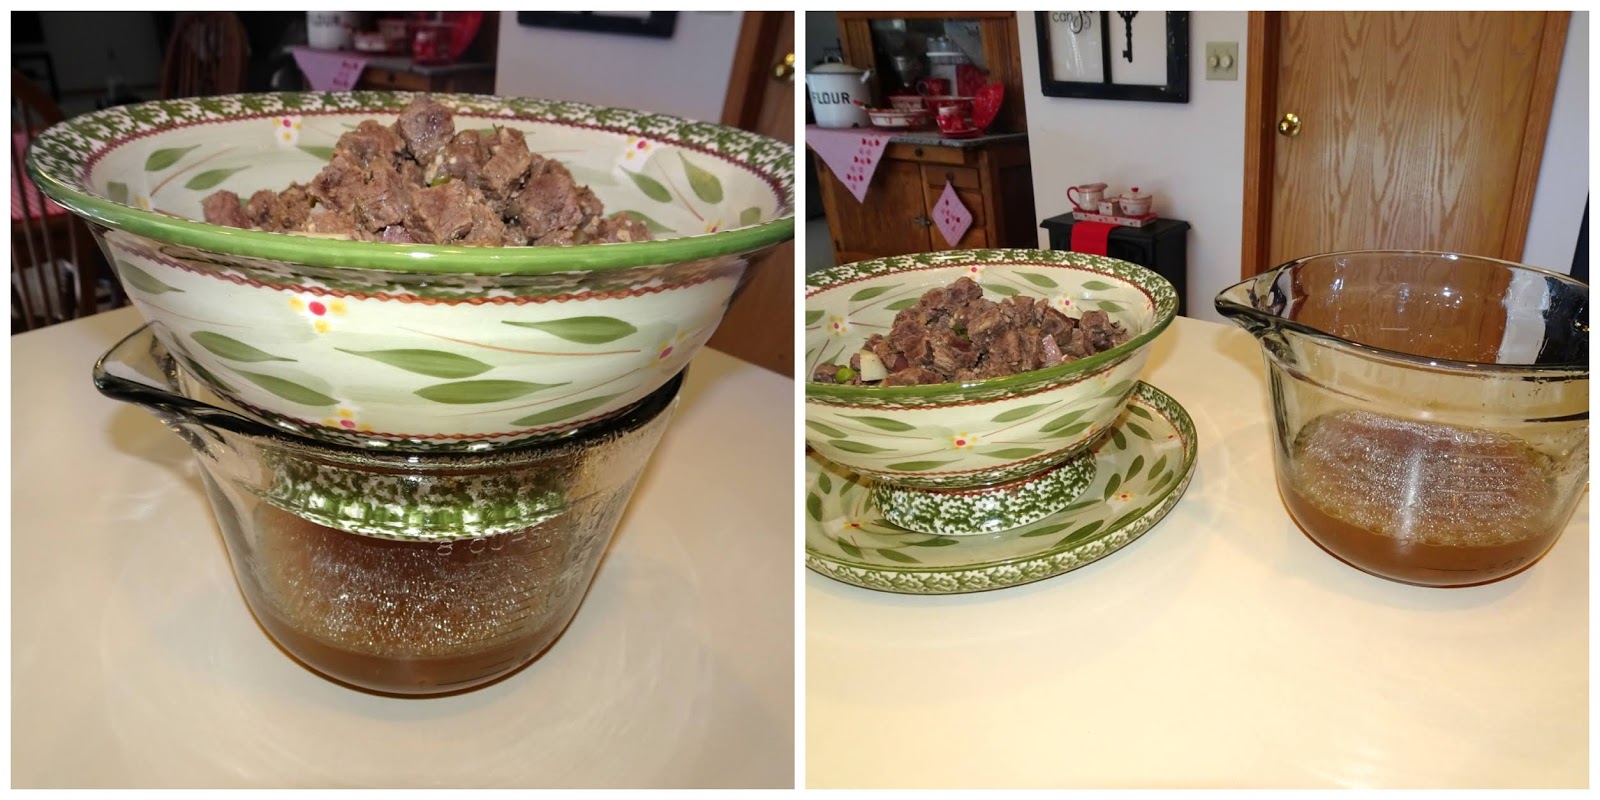
Remove the corned beef by using the trivet's handles. Place it in a covered Dutch oven, covered saute pan, or large, lidded casserole. Ladle some of the broth on top of the brisket and cover to keep warm. Pour broth out of pressure cooker pot into a 4-cup measuring cup or bowl. Put 1 1/2 cups of broth back into the pressure cooker pot reserving the rest of the broth.

Place the potatoes, carrots, and cabbage wedges into the pot in that order. Your pot will be very full and possibly above the max fill line, but that is fine. Lock pressure cooker lid in place, and set steam vent to Sealing. Select CANCEL and then select PRESSURE COOK (Manual) for 4 minutes on High pressure. It will take several minutes for it to come to pressure again. After the 4 minutes have passed, open the steam vent to release any remaining pressure (Quick Release), and carefully remove the lid.

Melt butter. Remove cabbage wedges with tongs and place on a tray or platter. Drizzle the wedges with melted butter and sprinkle with freshly ground black pepper.

Slice the corned beef brisket against the grain and plate along with the vegetables. Serve the brisket, potatoes, and carrots with the reserved broth.


This recipe was shared with me by my friend Gayle who is a personal chef.  My friend Kate has cooked many a corned beef brisket and gave me a lot of good advice, as well! ♥  Recipe instructions are my own.

Pressure Cooker Corned Beef and Cabbage 101:

Trim as much fat as you can from the brisket:


Pour the beef broth or other liquid into the pressure cooker pot and add the onion.  Place the trivet on top of the onions, and put the corned beef on the trivet.  The brisket may curve up along the inside of the pot:


This is the corned beef after cooking:


Enjoy!


Friday, February 28, 2020

Pressure Cooker Beef Pot Pie and Tutorial


For years, my husband has asked that I come up with a beef pot pie recipe that would surpass any that you could get at a restaurant or buy at a grocery store.  Once I got my pressure cooker, I knew the perfect filling was possible and in less time than preparing it in a Dutch oven.  After many, many tries, I finally succeeded.  I hope you enjoy this recipe as much as we do!


 Pressure Cooker Beef Pot Pie

Yield:  6 servings
Approximate Total Time:  2 hours, 45 minutes
Electric Pressure Cooker Size:  6 quarts

3/4 cup frozen peas
1 1/2 pounds beef stew meat (do not use beef stew meat labeled lean)
3/4 cup chopped onion
3 cloves of garlic, minced or 1 1/2 teaspoons of jarred minced garlic
3 cups beef broth, divided
3/4 tsp. dried thyme
1 bay leaf
1 1/2 cups diced red potatoes
3/4 cup diced carrots
4 Tbsp. cornstarch
4 Tbsp. milk
Salt and pepper to taste
1 box refrigerated pie crusts

Measure out peas and set aside to thaw.  Cut any large stew meat pieces into bite-size chunks and remove any fat.  Add stew meat to the pressure cooker pot along with the onion, garlic, 1 1/2 cups beef broth, thyme, and bay leaf.  Stir.  Lock the pressure cooker lid in place and set steam vent to Sealing.  Select PRESSURE COOK (Manual) and cook for 30 minutes on High pressure.
 

While it's cooking, cut up the potatoes (with or without the skin--I prefer with) and carrots into 1/2-inch pieces.
 
When the 30-minute cook time ends, let the pressure release naturally for 10 minutes, and then open the steam vent to release any remaining pressure (Quick Release).  When the valve drops, carefully remove the lid.  Remove bay leaf.

Add the potatoes, carrots, and peas.  (You can stir them in or just add them on top.) Lock the pressure cooker lid in place and set steam vent to Sealing.  Select PRESSURE COOK (Manual) and cook for 3 minutes on High pressure.  After the 3 minutes have passed, open the steam vent to release pressure (Quick Release).  Carefully remove the lid.  Select CANCEL.

Place a large colander over a large bowl.  Remove the pressure cooker pot from the unit and pour the filling into the colander to separate the broth from the meat/vegetable mixture.  Once drained, place the colander of meat and vegetables on top of a plate to catch any remaining drippings.  Set aside.  Pour pot pie broth from bowl into a 4-cup measuring cup.  Add enough of the remaining 1 1/2 cups beef broth to the pot pie broth to equal 3 cups.

Place the pressure cooker pot back into the unit.  Pour the 3 cups of pot pie broth into the pressure cooker pot.  Select SAUTE.  Stir together the cornstarch and the milk until smooth.  Slowly add to the pot pie broth stirring constantly until the pot pie broth is like gravy--about 4-5 minutes.  Season with salt and pepper to taste.

Select CANCEL.  Remove the pressure cooker pot from the unit and set on a cooling rack to cool.

Preheat oven to 425 degrees.  Remove refrigerated pie crusts from box and allow to stand at room temperature for 15 minutes.  This time is important to allow the gravy to cool.  Gently unroll one crust, and place it in an ungreased 9-inch pie plate.  Press crust firmly against side and bottom.  If the pie plate is a traditional glass or aluminum pie plate, trim the crust along the pan edge.  If the pie plate is a deeper pie plate like Fiesta pie plates, press the crust against the side and bottom but do not trim--allow the crust to stand up along the rim of the pie plate.

Pour the desired amount of meat/vegetables onto the bottom crust.  If your pie plate is shallow, you may not use it all.  Pour the desired amount of pot pie gravy on top of the meat/vegetables.  My pie plate is deep, so I use all of the meat/vegetables and all of the gravy.  Place second crust over filling.  Wrap excess top crust under bottom crust edge.  Press edges together to seal; flute.  Cut slits in top crust.  Bake at 425 degrees for 30-35 minutes.  Allow to cool for 5 minutes; serve.

Click here for printable format


Pressure Cooker Beef Pot Pie 101:

Place a large colander over a large bowl.  Remove the pressure cooker pot from the unit and pour the filling into the colander to separate the broth from the meat/vegetable mixture.  Once drained, place the colander of meat and vegetables on top of a plate to catch any remaining drippings:


Pour pot pie broth from bowl into a 4-cup measuring cup.  Add enough of the remaining 1 1/2 cups beef broth to the pot pie broth to equal 3 cups.

Place the pressure cooker pot back into the unit.  Pour the 3 cups of pot pie broth into the pressure cooker pot.  Select SAUTE.  Stir together the cornstarch and the milk until smooth.  Slowly add to the pot pie broth stirring constantly until the pot pie broth is like gravy--about 4-5 minutes.  Season with salt and pepper to taste.

Select CANCEL.  Remove the pressure cooker pot from the unit and set on a cooling rack to cool:


Gently unroll one crust, and place it in an ungreased 9-inch pie plate.  Press crust firmly against side and bottom.  If the pie plate is a traditional glass or aluminum pie plate, trim the crust along the pan edge.  If the pie plate is a deeper pie plate like Fiesta pie plates, press the crust against the side and bottom but do not trim--allow the crust to stand up along the rim of the pie plate.

Pour the desired amount of meat/vegetables onto the bottom crust.  If your pie plate is shallow, you may not use it all.  Pour the desired amount of pot pie gravy on top of the meat/vegetables.  My pie plate is deep, so I use all of the meat/vegetables and all of the gravy:


Place second crust over filling.  Wrap excess top crust under bottom crust edge:


Press edges together to seal; flute.  (To see photos of how I flute pie crust, see this post:  http://www.easyaspiecanbe.com/2013/12/perfect-pie-crust-recipe-and-tutorial.html) Cut slits in top crust.  Bake at 425 degrees for 30-35 minutes.  Allow to cool for 5 minutes.  Enjoy!


Friday, February 21, 2020

Pressure Cooker White Chicken Chili


This recipe for white chicken chili is our favorite by far. Besides tasty, it is so fast and easy and tastes like it's been simmering on the stove for hours.


Pressure Cooker White Chicken Chili


Yield:  4 generous servings
Approximate Total Time:  1 hour
Electric Pressure Cooker Size:  6 quarts

1 pound boneless, skinless chicken breasts (about 3 medium or 2 large), cut into bite-sized cubes
2 (15.5 oz.) cans great northern beans, drained and rinsed
1 1/2 cups chicken broth
1 cup chopped onion (about 1 medium)
2 (4 oz.) cans mild or hot diced green chilies
2 medium garlic cloves, peeled and minced or 1 tsp. jarred minced garlic
2 tsp. dried oregano
2 tsp. ground cumin
1/4 cup heavy cream or half and half
2 tbsp. yellow cornmeal
Salt to taste
Shredded Monterey Jack, Colby, or white Cheddar cheese (about 1/4 cup per serving)
Sour cream (optional)


Mix the chicken, beans, broth, onion, chilies, garlic, oregano, and cumin in the pot.  Lock pressure cooker lid in place and set steam vent to Sealing. Select PRESSURE COOK (Manual) and cook for 7 minutes on High pressure.


After the 7 minutes have passed, open the steam vent to release pressure (Quick Release).  Carefully remove lid. Select SAUTE and bring chili to a simmer. Stir in the cream and cornmeal.  Cook, stirring constantly, until the chili thickens somewhat, about 3 minutes. Select CANCEL, and then select KEEP WARM.  Salt to taste and serve with shredded cheese and sour cream if desired.

Click here for printable format

*Recipe posted with permission from author Bruce Weinstein.

Recipe from Weinstein, Bruce and Mark Scarbrough.  The Instant Pot Bible. New York, New York: Little, Brown and Company, 2018:  p. 126


Friday, February 14, 2020

Pressure Cooker Grandma Mills' Banana Nut Bread


Banana Nut Bread made in a pressure cooker?  Yes!  This recipe produces a delicious, moist bread with a tender crumb through and through.  No heating up the kitchen and perfect results every time!


Pressure Cooker Grandma Mills' Banana Nut Bread

Yield:  8 servings
Approximate Total Time:  1 hour, 50 minutes 
Electric Pressure Cooker Size:  6 quarts

Jill Selkowitz is a well-respected blogger and cookbook author.  Her website, This Old Gal, has tried and true recipes including this one for Pressure Cooker Grandma Mills' Banana Nut Bread found here:  https://thisoldgal.com/pressure-cooker-grandma-mills-banana-nut-bread/

Notes:

*I use 1/2 tsp. regular table salt instead of sea salt.

*Spray the 6-cup bundt pan with a baking spray that contains flour like Baker's Joy.  

*I lightly cover my pan with a piece of foil sprayed with cooking spray like Pam.  Place the sprayed side down over the pan.  The bread will rise so don't crimp the edges of the foil down tightly over the pan.

*For the 6-cup bundt pan, cook at high pressure for 55 minutes.  After the pressure is released from the pot, remove the bundt pan.  Carefully remove foil and let banana bread rest for 15 minutes.  To unmold, place a large plate on top of the bundt pan, and invert the pan in one fluid motion, holding the plate tightly to the pan.

Click here to print!

Friday, February 7, 2020

Chocolate Fudge Mug Cake


Fudgy, chocolatey, delicious cake for one or two in less than 10 minutes!


Water and whipped topping not shown.


Chocolate Fudge Mug Cake

4 Tbsp. flour
4 Tbsp. sugar
1/8 tsp. baking soda
1/8 tsp. salt
2 Tbsp. cocoa
2 Tbsp. vegetable or canola oil
1 Tbsp. water
3 Tbsp. milk
1/4 tsp. vanilla
2 Tbsp. semi-sweet chocolate chips
Ice cream, whipped cream, or whipped topping (opt)

In a 12- to 16-oz. microwave-safe mug, combine the first five ingredients.  Add the liquid ingredients and stir with a spatula making sure to scrape the bottom of the mug to combine all ingredients.  Stir in chocolate chips.  Microwave for 1 minute, 45 seconds on high.  Let cake rest for a couple of minutes before serving with the topping of your choice.  Serves 1 or 2.

Friday, January 31, 2020

Bubble Up Pizza


Bubble Up Pizza--5 ingredients, quick to make, and a great alternative to regular pizza! 🍕


Bubble Up Pizza

1 pound ground beef
1 (16 oz.) can refrigerated jumbo biscuits
1 (15 oz.) can pizza sauce
1 (5 oz.) package sliced pepperoni
2 cups (or desired amount) shredded cheese (mozzarella, cheddar, or a combination)

Preheat oven to 375 degrees.  Brown the ground beef, drain, and return to skillet.  Turn off heat under skillet.  Cut the biscuits into 6 pieces by cutting each biscuit in half and then each half into 3 wedges.  Add the can of pizza sauce to the ground beef; mix well.  Add the biscuit pieces and lightly stir to coat.

Spray a 9x13 baker with nonstick spray.  Spread the biscuit mixture evenly.  Top with desired amount of sliced pepperoni.  (I use about a fourth of a 5 oz. package.)  Sprinkle with desired amount of shredded cheese reserving some for the final topping.   Add another layer of pepperoni.  (I use about another fourth of the 5 oz. bag.)  Sprinkle with a light topping of reserved shredded cheese.  Bake at 375 degrees for 30 to 35 minutes.


If made as written using 93/7 ground beef, turkey pepperoni, 1 cup of mozzarella cheese, and 1 cup of cheddar cheese, each serving has:


Saturday, January 25, 2020

Instant Pot Egg Roll in a Bowl


Egg Roll in a Bowl is so simple and amazingly delicious!  Served with wonton chips or rice, it is a healthy, robust meal.  Egg rolls turned inside out...who would have thought?  I also include the recipe for wonton chips and an amazing sweet and sour sauce!

1 1/2 pounds of ground pork is pictured, but I use one pound as called for in the recipe.

Instant Pot Egg Roll in a Bowl

Yield:  4 servings
Approximate Total Time:  Filling:  45 minutes
                                         Wonton Chips:  35 minutes
                                        Filling and Wonton Chips made consecutively:  1 hour 
Electric Pressure Cooker Size:  6 quarts

One of my favorite pressure cooker recipe authors is Sandy Clifton.  Author of Simply Happy Electric Pressure Cooking, she also has a blog called Simply Happy Foodie, which is where the recipe for Instant Pot Egg Roll in a Bowl can be found:  https://www.simplyhappyfoodie.com/instant-pot-egg-roll-bowl/

Instant Pot Egg Roll in a Bowl 101:

1)  I make the recipe as written but use a 16 oz. bag of coleslaw mix.  I don't use the Sriracha.

2)  Before serving, salt and pepper to taste.

3)  I often make the wonton chips earlier in the day to get that step out of the way.  If doing so, it will take about 35 minutes to make them from start to finish.  After cooling, store them in an airtight container.  If I make them at the same time that I do the filling, I start the wonton chips first and then start on the filling.  

4)  You only need half of the 16 oz. package of wonton wraps.  The other half of the wraps can be baked as chips and stored in the freezer for future use if desired.

Wonton Chips

1 (16 oz.) package wonton wraps (found in the produce section)
Nonstick cooking spray (Pam)

Preheat oven to 350 degrees.  Spray 2 baking sheets with nonstick cooking spray.  Cut half of the wonton wraps diagonally so that they form 2 triangles.  A pizza cutter works well for this.  Arrange wonton wraps on the baking sheets.  (See photo.)  Place one tray at a time on the middle oven rack and bake until golden brown.  This will take from 5-10 minutes depending on the thickness of the baking sheet.  Cool before serving.


If made as written using 80/20 ground pork, low sodium soy sauce, 2 tbsp. toasted sesame oil, and a 16 oz. bag of coleslaw mix, each serving has:


7 wonton chips have 80 calories:


Friday, January 24, 2020

Baked Wonton Chips


Baked Wonton Chips are so easy to make and are perfect to serve with Asian dips and entrees.

Baked Wonton Chips

1 (16 oz.) package wonton wraps (found in the produce section--see photo below)
Nonstick cooking spray (Pam)

Preheat oven to 350 degrees.  Spray 2 baking sheets with nonstick cooking spray.  Cut wonton wraps diagonally so that they form 2 triangles.  A pizza cutter works well for this.  Arrange wonton wraps on the baking sheets.  (See photo.)  Place one tray at a time on the middle oven rack and bake until golden brown.  This will take from 5-10 minutes depending on the thickness of the baking sheet.  After the first two trays of chips have cooled, remove chips from trays.  Wash trays, respray with cooking spray, and bake the remaining wraps.  Cool before serving.  If desired, baked chips can be stored in an airtight container in the freezer for future use.

Click here for printable format

Baked Wonton Chips 101:

1)  These are the wraps I buy:


2)  This is how I arrange the wonton wraps on a baking sheet:


Saturday, January 11, 2020

100-Calorie Brownie


The heavens opened, and the angels sang when I discovered this recipe!  All natural ingredients, ready to eat in less than 5 minutes, less than 100 calories, and delicious chocolatey goodness to boot.  What more could a person want? ♥️


100-Calorie Brownie

This delectable recipe comes from Brooklyn Farm Girl:  https://brooklynfarmgirl.com/100-calorie-single-serving-brownie/

100-Calorie Brownie 101:

*I use unsweetened applesauce.  Different brands affect the taste of the brownie depending on the apples used.  I personally prefer Wal-Mart's Great Value unsweetened applesauce.

*Any small mug or ramekin that will hold 6-8 oz. will work.


Wednesday, January 1, 2020

Instant Pot Detox and Weightloss Cabbage Soup


Once I tried this cabbage soup recipe, I tossed out the one I'd used for almost 40 years!  Flavorful and low in calories (107 per large serving), you can use this recipe for the infamous cabbage soup diet, to detox, or to substitute for a few meals to help speed weight loss.


Instant Pot Detox and Weightloss Cabbage Soup

Yield:  6 servings
Approximate Total Time:  1 hour 
Electric Pressure Cooker Size:  6 quarts

Adventures of a Nurse features some really good recipes...and this is one of them!  😀

Instant Pot Detox and Weightloss Cabbage Soup 101:

*I chop the onion and slice the carrots and celery into bite-size pieces. I chop the cabbage into smaller pieces than is called for in the recipe, as I like cabbage more tender, and larger pieces will be firmer.

*I use regular chicken broth--not low sodium.

Click here to print!


Saturday, December 21, 2019

Rootitoot Real Eggnog Cheesecake


A classic holiday beverage made into a rich and creamy cheesecake is perfect for Christmas!


Rootitoot Real Eggnog Cheesecake

Yield:  6-8 slices
Approximate Total Time:  26 hours 
       (2 hours and then 24 hours of cooling time)

Ruth "Rootitoot" McCusker created this recipe so that it is perfect for everyone including beginners. You can find the recipe on Ruth's website:  https://rootitoot.com/recipes-and-cooking/desserts/rootitoot-real-eggnog-cheesecake/

Sweetened Whipped Cream:  I have two whipped cream recipes that I use.  One makes soft dollops of whipped cream and the other (stabilized) makes a firm whipped cream that will hold its shape and firmness for days in the refrigerator.  I used the first recipe below on the cheesecake in this post.

Whipped Cream:    http://www.easyaspiecanbe.com/2013/12/whipped-cream-recipe-and-tutorial.html

Stabilized Whipped Cream:   http://www.easyaspiecanbe.com/2019/12/stabilized-whipped-cream.html


Gail Rose Lam's Cheesecake 101:

A member (Gail Rose Lam) of an Instant Pot Facebook group to which I belong, makes the most beautiful cheesecakes you've ever seen.  She was kind enough to share her technique with me, which is what I used to create the cheesecake in the post photo.  Here are her tips in no particular order along with some I've gleaned along the way:
  • I use a 6-qt. pressure cooker.
  • I use a Fat Daddio's 6x3 springform pan available here:  https://www.amazon.com/Fat-Daddios-Anodized-Aluminum-Springform/dp/B001VEI05G/ref=sr_1_1?ie=UTF8&qid=1536686269&sr=8-1&keywords=fat+daddio%27s+6x3+springform
  • Baking or freezing the crust is not necessary.
  • Pat crumbs firmly in place using a flat-bottomed glass, measuring cup, or tamper.  Stagger the sides to create varying heights.
  • There is no need to warm the filling ingredients to room temperature if you have a food processor.  Put all the cold ingredients into the food processor at one time and process on high until the sugar is dissolved and everything is incorporated scraping the sides down occasionally.  This will take a few minutes.  No air will be incorporated into the cheesecake filling, so there won't be air bubbles after the cheesecake cooks.
  • Once you remove the lid, you can easily determine if the cheesecake has finished cooking by using an instant-read thermometer to check that the cheesecake has reached 150 degrees F. A few degrees on either side of 150 is fine. If not, relock the lid and cook the cheesecake at High pressure for 5 more minutes, using a 10-minute natural release.
  • After the cheesecake has cooled for 24 hours, you can remove the sides and use the back of a spoon dipped in hot water to smooth any side or top imperfections.
  • I use this jumbo spatula that has a thin metal edge to move the cheesecake to a serving piece:  https://www.amazon.com/Wilton-570-1161-Jumbo-Cookie-Spatula/dp/B003CN5SVI/ref=sr_1_15?ie=UTF8&qid=1536687273&sr=8-15&keywords=wilton+cookie+spatula
  • I have two silicone gaskets for my pressure cooker, since the silicone gaskets tend to retain odor.  I use my clear gasket for savory dishes and my red gasket for sweet dishes.

Friday, December 20, 2019

Stabilized Whipped Cream


Need a whipped cream recipe that stays put?  This is the one!  Perfect for piping on pies, filling cupcakes, or frosting cakes, it will keep its shape for several days without drooping or becoming soft or runny.

16 ounces of cream is shown, but you will only need 8 ounces (1 cup).


Stabilized Whipped Cream

4 tsp. water
1 tsp. unflavored gelatin
1 cup heavy whipping cream
3 tbsp. granulated sugar
1/2 tsp. vanilla

Place a metal, glass, or ceramic 3- or 4-qt. mixing bowl and beaters into the freezer for 10 to 15 minutes. Add the water to a small microwave-safe bowl (like a custard cup), and sprinkle the gelatin on top.  Allow to rest for about 5 minutes.  Transfer the gelatin mixture to the microwave, and microwave until the gelatin is fully dissolved--about 10-15 seconds.  Stir the mixture; set aside to cool to room temperature.  

Add the whipping cream, granulated sugar, and vanilla to the mixing bowl, and with an electric mixer at medium-high speed, beat just until the cream starts to thicken and soft peaks form. Turn the mixer to low speed (very important). Slowly pour in the room-temperature gelatin mixture until well combined. Increase the mixer to medium speed (no higher) and continue mixing until stiff peaks form.

Pipe the whipped cream on your favorite dessert and refrigerate until ready to serve.


Notes:  

1)  I have a KitchenAid stand mixer, but I prefer to use a hand mixer for whipped cream and meringue.  I feel it gives more control over the end product.

2)  This whipped cream will hold up fine at room temperature for a couple of hours, but it's best to keep your dessert refrigerated and avoid leaving it anywhere too warm for too long.

3)  This recipe is best for piping on desserts, piping into cupcakes, or frosting cakes or cupcakes.  If you're wanting to mound piles of whipped cream on a dessert or pie, I suggest the following recipe as the texture is better suited for that purpose.  However, the whipped cream will only stay firm for several hours before starting to soften, and the dessert should be refrigerated the whole time.


A coconut cream pie topped with stabilized whipped cream.