Showing posts with label Breads. Show all posts

Friday, February 26, 2021

Sausage Pancake Muffins


Served with syrup, Sausage Pancake Muffins are reminiscent of McDonald's Sausage McGriddles™.  These can be easily reheated for a delicious quick breakfast, too!


Sausage Pancake Muffins

1 pound pork sausage
2 cups flour
1/4 cup sugar
1 tsp. salt
3 tsp. baking powder
1/4 tsp. nutmeg
1/2 tsp. cinnamon
1 egg, beaten
2 Tbsp. vegetable or canola oil
2 cups milk
2 Tbsp. honey
Syrup and/or butter

Preheat oven to 350 degrees.  Spray 12 standard size muffin cups with a baking spray like Baker's Joy.  In a skillet, brown sausage on medium heat crumbling it into small pieces; drain and set aside.  In a large mixing bowl (I use a 4-qt. bowl), stir together the flour, sugar, salt, baking powder, nutmeg, and cinnamon.  In a smaller bowl, combine the beaten egg, vegetable oil, and milk.  Add to flour mixture and stir until combined.  Add the honey and stir.  Fold in the sausage.

Fill each muffin cup almost to the top.  (You may not use all of the batter.)  Bake at 350 degrees for 25 minutes or until a toothpick inserted into the center of a muffin comes out mostly clean. Allow muffins to cool in pans on a wire rack for 15 minutes.  Run a knife around the muffins, and then remove the muffins from pans to a wire rack for further cooling.  Serve warm with syrup and/or butter.  Refrigerate or freeze any leftovers.


Friday, November 20, 2020

Pressure Cooker Monkey Bread


Monkey Bread...cinnamon-y sweet, buttery, sticky deliciousness!  


Pressure Cooker Monkey Bread

Yield:  4 servings
Approximate Total Time:  1 hour, 10 minutes 
Electric Pressure Cooker Size:  6 quarts

1/3 cup chopped pecans (optional)
1/3 cup white sugar
1 tsp. cinnamon
1 (16 oz.) can refrigerated jumbo buttermilk biscuits
6 Tbsp. butter
1/2 cup brown sugar
1 1/2 tsp. cinnamon

Spray a 6-cup bundt pan with a baking spray that contains flour like Baker's Joy.  Scatter half the chopped pecans in the bottom of the bundt pan. In a small bowl, stir together the 1/3 cup white sugar with the 1 tsp. of cinnamon.  Cut the biscuits into 6 pieces by cutting each biscuit in half and then each half into 3 wedges.  Roll each biscuit piece in the cinnamon/sugar mixture.  (Discard any remaining mixture.)  Place half of the biscuit pieces (24 pieces) into the bundt pan.  Scatter the remaining chopped pecans on the biscuit pieces.    

In a small saucepan over medium heat, melt the butter, 1/2 cup brown sugar, and 1 1/2 tsp. cinnamon together stirring constantly.  When the mixture comes to a boil, boil for one minute and remove from heat.  Pour a little less than half the mixture over the biscuit pieces.  Place the rest of the biscuit pieces into the bundt pan, stir the remaining butter mixture well, and then pour the butter mixture evenly over the top.  Loosely cover the pan with foil.

Pour one cup of water into the pressure cooker pot.  Place trivet in pot and place covered bundt pan on top of the trivet.  Lock the pressure cooker lid in place and set steam vent to Sealing.  Select PRESSURE COOK (Manual) and cook for 25 minutes on High pressure.

When the 25-minute cook time ends, let the pressure release naturally for 15 minutes, and then open the steam vent to release any remaining pressure (Quick Release).  Should the float valve drop before 15 minutes is completed, leave the pot sealed for the full 15 minutes.  

Using oven mitts, remove the bundt pan from the pressure cooker pot.  Remove foil.  To unmold, place a large plate on top of the bundt pan, and invert the pan in one fluid motion, holding the plate tightly to the pan.  Break pieces off and eat like a monkey! 🐒


Note:  I highly recommend this bundt pan and this sling (trivet).


Sling:  https://www.amazon.com/OXO-11249500-Pressure-Cooker-Bakeware/dp/B07G418RSL/ref=sr_1_1_sspa?keywords=oxo+sling&qid=1578863718&sr=8-1-spons&psc=1&spLa=ZW5jcnlwdGVkUXVhbGlmaWVyPUExU1BGUUkzT1YyQjYxJmVuY3J5cHRlZElkPUEwNDYxNTk2MVhPRURTUUxUUVUwSCZlbmNyeXB0ZWRBZElkPUEwNDAzMDI0MzNVMDIxQldCRjVQQiZ3aWRnZXROYW1lPXNwX2F0ZiZhY3Rpb249Y2xpY2tSZWRpcmVjdCZkb05vdExvZ0NsaWNrPXRydWU=

Friday, February 14, 2020

Pressure Cooker Grandma Mills' Banana Nut Bread


Banana Nut Bread made in a pressure cooker?  Yes!  This recipe produces a delicious, moist bread with a tender crumb through and through.  No heating up the kitchen and perfect results every time!


Pressure Cooker Grandma Mills' Banana Nut Bread

Yield:  8 servings
Approximate Total Time:  1 hour, 50 minutes 
Electric Pressure Cooker Size:  6 quarts

Jill Selkowitz is a well-respected blogger and cookbook author.  Her website, This Old Gal, has tried and true recipes including this one for Pressure Cooker Grandma Mills' Banana Nut Bread found here:  https://thisoldgal.com/pressure-cooker-grandma-mills-banana-nut-bread/

Notes:

*I use 1/2 tsp. regular table salt instead of sea salt.

*Spray the 6-cup bundt pan with a baking spray that contains flour like Baker's Joy.  

*I lightly cover my pan with a piece of foil sprayed with cooking spray like Pam.  Place the sprayed side down over the pan.  The bread will rise so don't crimp the edges of the foil down tightly over the pan.

*For the 6-cup bundt pan, cook at high pressure for 55 minutes.  After the pressure is released from the pot, remove the bundt pan.  Carefully remove foil and let banana bread rest for 15 minutes.  To unmold, place a large plate on top of the bundt pan, and invert the pan in one fluid motion, holding the plate tightly to the pan.

Click here to print!

Friday, January 11, 2019

Wheat Bread


This wheat bread recipe produces a tall loaf that is light and fluffy.  It is so good slathered with butter while still warm from the bread machine, and it makes delicious toast.


Wheat Bread

Taste of Home has amazing recipes, and one of them is the Wheat Bread recipe found here:
https://www.tasteofhome.com/recipes/bread-machine-wheat-bread/

New to making bread in a bread machine?  I have a tutorial that will teach you everything you need to know!  Click here for Bread Machine 101

Wheat Bread 101:

*Your egg should be room temperature.  A safe way to achieve this is to place the egg in a cup of hot water for 5 minutes.

*Select Basic or White Bread Cycle, 1.5-pound setting, and medium crust setting.  

*Remove immediately from baking pan when done and let cool 15 minutes before slicing.

Click here to print!


Friday, January 26, 2018

Honey Oatmeal Bread


Honey Oatmeal Bread is my favorite homemade bread.  The slightly sweet taste combined with its rustic look makes it perfect to serve with many meals.


Honey Oatmeal Bread

1 cup water (between 70-80 degrees F)
1 tbsp. vegetable or canola oil
1/4 cup honey
1 tsp. salt
2 1/3 cups bread flour
1/2 cup old-fashioned (rolled) oats
1 rounded tsp. active dry yeast

1.  In bread machine pan, place all ingredients in order suggested by manufacturer.   

2.  Select Basic or White Bread Cycle, 1-pound setting, and medium or dark crust setting.  (I use dark.)

3.  Bake according to bread machine directions (check dough after 5 minutes of mixing; add 1 to 2 tablespoons of water or flour if needed).  

4.  Remove immediately from baking pan when done and let cool 15 minutes before slicing.

Click here for printable format

New to making bread in a bread machine?  I have a tutorial that will teach you everything you need to know!  Click here for Bread Machine 101


Friday, September 1, 2017

Best-Ever Scones and Tutorial


The name of this recipe says it all...these are the richest, crumbliest, best scones (and easiest!) you will ever make.  Your search for the perfect scone recipe is over.


Best-Ever Scones

MyRecipes is a great source for a variety of recipes including Best Ever Scones.  Several sweet or savory variations are provided with the recipe found here: http://www.myrecipes.com/recipe/best-ever-scones

Best-Ever Scones 101:

*I like to partially make the dough ahead of time.  Not only does it save time, but the results are superior to an already great recipe.  I mix the dry ingredients with the butter, and then put this mixture into a freezer bag and freeze it until needed.  When ready to make the scones, I put the frozen flour/butter mixture into a 4 qt. mixing bowl and proceed with the recipe from adding the cream onward.

*After stirring in the cream, the mixture will be crumbly.  After this step, then fold in 1/2 cup semi-sweet chocolate chips, 1/2 cup sweetened dried cranberries or cherries, or 1/2 cup toasted pecans for an easy, sweet version.

*I have found this method to be the easiest way to make scones:  Turn dough out onto a cutting mat or wax paper; gently press or pat dough into a 7-inch round.  Cut round into 8 wedges with a pizza cutter.  Using a pie server, place wedges 2 inches apart on a baking sheet sprayed with cooking spray.  Brush a very thin layer of the remaining cream onto tops of wedges.  You will not use all the remaining cream.

Click here to print!

Many thanks to my niece Shelby for helping me make the scones featured in this post!

Best-Ever Scones 101:

This is what the scone mixture looks like after folding in the chocolate chips.  You can see that it is very crumbly:


Turn dough out onto cutting mat or wax paper; gently press or pat dough into a 7-inch round.  The mixture easily comes together into the round as the warmth from your hands helps the butter hold the mixture together:


Cut round into 8 wedges with a pizza cutter.  Using a pie server, place wedges 2 inches apart on a baking sheet sprayed with cooking spray:


Brush with cream, bake, and enjoy!  :)


Friday, May 19, 2017

Strawberry Lemonade Muffins


Tartness from the lemon contrasts well with fresh, sweet strawberries in these muffins.  


Strawberry Lemonade Muffins

MyRecipes is a great site to find just the recipe for which you're looking!  Strawberry Lemonade Muffins can be found there as well as many others:  https://www.myrecipes.com/recipe/strawberry-lemonade-muffins

Notes:

*If using ceramic muffin pans, allow muffins to cool in pans on a wire rack for 15 minutes.  Run a knife around the muffins, and then remove the muffins from pans to a wire rack for further cooling.

*Baking Tip:  When you need freshly squeezed lemon, lime, or orange juice for a recipe, microwave the fruit first to making juicing easier.  Place the lemon, orange, lime, or other citrus fruit in the microwave.  Heat on high for 20-30 seconds.  Remove from the microwave and let it rest for about half a minute. Cut the citrus fruit in half and squeeze. The juice will flow easily. 

Click here to print!


Friday, March 11, 2016

Easy Irish Soda Bread


Dotted with raisins and baked until golden brown, this Irish soda bread has a way of making everyone feel lucky!


Easy Irish Soda Bread

Taste of Home has the best recipe for Easy Irish Soda bread.  It can be found here:  https://www.tasteofhome.com/recipes/easy-irish-soda-bread/

Easy Irish Soda Bread 101:

*Before starting recipe, put raisins into a small bowl and cover with boiling water.  Let rest for two minutes and then drain well.

*Stir batter with a sturdy spoon.  Batter will be very heavy and thick.

*I use Crisco to grease the 9-in. springform pan and then pat/spread the batter evenly into the pan. 

*If removal of bottom pan is desired, wait until bread has cooled 10 minutes, and then run a metal spatula (like an off-set spatula) between the bread and bottom pan.  Remove bread to a serving tray and cut into wedges.  

*Recipe may be halved and baked in a 6x3 springform pan.  Bake for 38-43 minutes or until a toothpick inserted into the center comes out clean.  If a browner top is desired, put the bread several inches under the broiler set on low until the desired color is reached.

Click here to print!


Friday, June 5, 2015

Hamburger Buns and Tutorial


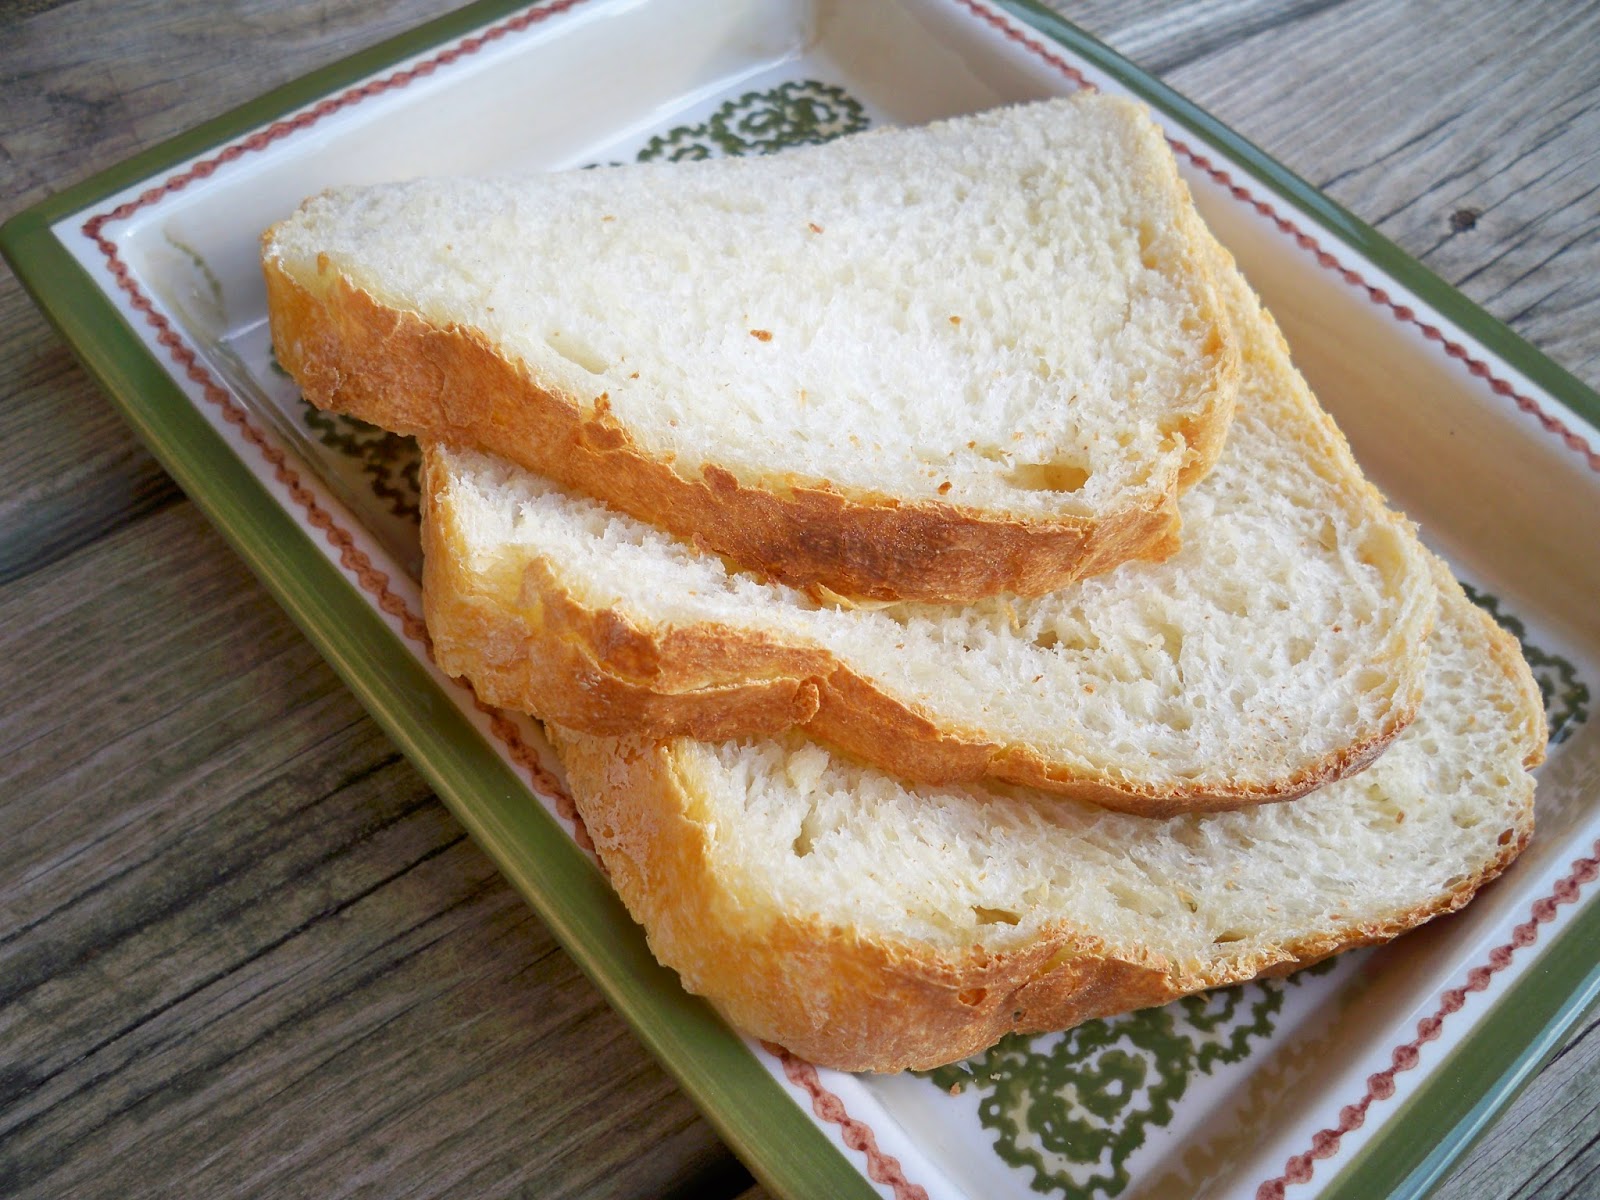
Most people don't give hamburger buns a second thought...except when they get soggy and fall apart, because they can't stand up to the rigors of homemade burgers, pulled pork, or sandwiches piled high with meat and juicy toppings.  These buns, made with whole wheat, won't let you down.  They are soft but have just enough firmness to hold whatever you put on them...so pile away!

Only 1 1/4 tsp. of instant or bread machine yeast is needed.

Hamburger Buns

1 1/4 cups water (between 77-85 degrees F)
1 egg*
1 1/4 tsp salt
2 tbsp. granulated sugar
2 tbsp. vegetable or canola oil
1 1/2 cups whole wheat flour
2 3/4 cups bread flour
1/3 cup buttermilk powder
1 1/4 tsp. instant or bread machine yeast

1. Measure ingredients into baking pan in the order recommended by the manufacturer. (Make sure the buttermilk powder does not touch any liquid.) Insert pan into the bread machine. Select dough cycle.

2. Remove dough to a lightly floured surface (I use a cutting mat). Cover with a large bowl and let rest for 10-15 minutes.  Meanwhile, spray two baking sheets with cooking spray.

3. Round the dough into a large, slightly flattened ball. Using a pizza cutter, cut into eighths.

4. Form smooth round balls by pulling the dough around the center and pinching the seams together on the bottom of the roll. Place them on the baking sheets allowing room for them to expand.

5. On the baking sheets, gently press the balls into flat discs with your hand. The dough will tend to spring back. Allow the dough to relax a few minutes and then press again. You may need to repeat the process again until you have discs that are 3 1/2 to 4 inches in diameter and 1/2 to 3/4-inches thick.

6. Cover and let rise in a warm, draft-free place for 30-45 minutes or until doubled in volume.

7. Preheat oven to 375 degrees and bake for 15-20 minutes until buns sound hollow when tapped on the bottom.

8.  Remove to a wire rack to cool, and when cool, store in an airtight container.  Slice with an electric knife or bread knife to serve.


*Your egg should be room temperature.  A safe way to achieve this is to place the egg in a cup of hot water for 5 minutes.

If you're new to bread-making...no worries!  I've created a Bread Machine Basics 101 that will teach you everything you need to know about making bread:  http://easyaspiecanbe.blogspot.com/2014/09/bread-machine-basics-101.html

***Recipe from Washburn, Donna and Heather Butt.  300 Best Bread Machine Recipes. Toronto, Ontario: Robert Rose, Inc., 2010:  p. 268 

Hamburger Buns 101:

From start to finish, these buns take about 4 hours to make but very little hands-on time.  I like to make them the day before I'm going to serve them and store them in an airtight container.  I particularly like this bun recipe for pulled pork.

Remove dough to a lightly floured surface (I use a cutting mat). Cover with a large bowl and let rest for 10-15 minutes:


 Round the dough into a large, slightly flattened ball. Using a pizza cutter, cut into eighths:


Form smooth round balls by pulling the dough around the center and pinching the seams together on the bottom of the roll:


Place them on the baking sheets allowing room for them to expand.  On the baking sheets, gently press the balls into flat discs with your hand. The dough will tend to spring back. Allow the dough to relax a few minutes and then press again. You may need to repeat the process again until you have discs that are 3 1/2 to 4 inches in diameter and 1/2 to 3/4-inches thick:


Cover and let rise in a warm, draft-free place for 30-45 minutes or until doubled in volume.  I use my unheated oven.  Place bakers of hot water on the oven's floor.  Cover the shaped dough loosely with dampened, lightweight towels.  If it's wintertime and really cold out, I will also leave on the oven light.  Close the door and let the dough rise until doubled.  Remove trays and preheat the oven.


Preheat oven to 375 degrees and bake for 15-20 minutes until buns sound hollow when tapped on the bottom.  Remove to a wire rack to cool, and when cool, store in an airtight container:


These buns are particularly good if, after cutting them open, you spread each cut side with butter and broil until toasted...enjoy!


Friday, February 20, 2015

Banana Bread


What could be easier than making banana bread in the bread machine? The most difficult part of this delicious recipe is waiting for the bread to be done. 


 Banana Bread

1/2 cup milk (between 77-85 degrees F)
1 cup mashed ripe bananas
2 eggs
1/2 tsp. salt
1 cup sugar
1/2 cup vegetable or canola oil
2 1/4 cups bread flour
2 tsp. baking powder
1 tsp. baking soda
1/2 cup chopped nuts (opt.)

1. Measure ingredients including nuts into baking pan in the order recommended by the manufacturer. Insert pan into the machine. Select "Quick" or "Cake" cycle.

2. Halfway through mixing time, using a rubber spatula, scrape down sides of baking pan and the kneading blade.

3. When signal sounds indicating the end of the baking cycle, test for doneness with a wooden skewer. If ready, remove baking pan from bread machine. If not, keep in bread machine on "Keep Warm Cycle" for 10-30 minutes or on "Bake Cycle" until baked.

4. Set baking pan on a cooling rack for 10 minutes. Turn bread out onto a serving plate and set aside to cool completely.

*For a moist texture, cool overnight before slicing.

*Some bread machines may require up to 50 minutes on the "Keep Warm Cycle" before the quick bread is baked. For specifications on the length of this cycle, and for information on how to use it, check the user's manual for your bread machine.


Click here for printable format 

*Recipe from Washburn, Donna and Heather Butt.  300 Best Bread Machine Recipes. Toronto, Ontario: Robert Rose, Inc., 2010:  p. 403 


Friday, January 30, 2015

Blueberry Muffin Bread


If you like blueberry muffins and have a bread machine, you should try Blueberry Muffin Bread.  I used to buy Sara Lee's Blueberry Crumble Bread, but this recipe gives it a run for its money.

Only 1 tsp. of yeast is needed.


Blueberry Muffin Bread

3/4 cup milk (between 77-85 degrees F)
1 egg*
3 tbsp. water (between 77-85 degrees F)
2 tbsp. butter (cut in pieces, room temperature)
3 tbsp. sugar
3/4 tsp. salt
1/4 tsp. ground nutmeg
1/3 cup dried blueberries**
3 cups bread flour
1 tsp. active dry yeast or bread machine yeast

 1. Measure all ingredients (even blueberries) into baking pan in the order recommended by the manufacturer. Insert pan into the bread machine.

2. Select Basic or White Bread Cycle, 1.5-pound setting, and medium crust setting.

3. Remove immediately from baking pan when done and let cool 15 minutes before slicing.


*Your egg should be room temperature.  A safe way to achieve this is to place the egg in a cup of hot water for 5 minutes.

**Look for dried blueberries that are fresh and soft, because you want the blueberries to break up during mixing.  The best I've found is the Mariani brand available at Wal-Mart.

Note:  This makes great toast.  After the first day or two, I slice the rest of the loaf and lay the slices side-by-side on baking sheets. I freeze the slices (don't even have to bother covering), and when they're frozen, I put them in freezer Ziploc bags. Then I just pull out a piece now and then and pop it in the toaster...no thawing needed. I do have to run it through a couple of toasting cycles, but it tastes like I just made it.


Saturday, September 27, 2014

Bread Machine Basics 101


Bread Machine Basics 101

A friend talked me into getting a bread machine, and it is one of the best kitchen appliances I've ever bought.  I use it so often, that besides the coffee pot, it is the only appliance left out on my kitchen counter!  If you have thought about getting one or have one but haven't had much success, I encourage you to do two things.  First, read this guide for lots of hints and tips for successful baking, and second, for your very first loaf that is guaranteed to be a success, make my Best Bread Machine Bread.  Unlike some recipes, you don't have to add extra flour or water to get the dough "just right", and the dough will form perfectly allowing you to see what a perfect dough ball looks like.

Baking Bread

Tools:  You will need a liquid measuring cup, dry measuring cups, measuring spoons, a silicone spatula, and a thermometer.  An electric knife to slice the loaf is also extremely helpful.  I prefer to use a digital meat thermometer, and here is a link to the one I use as well as a link to my bread machine...the Oster Expressbake Breadmaker.

http://www.walmart.com/ip/Oster-Expressbake-Breadmaker/12399570
  
http://www.amazon.com/Polder-Safe-Serve-Instant-Kitchen-Thermometer/dp/B00881O8JM/ref=sr_1_3?ie=UTF8&qid=1411344476&sr=8-3&keywords=polder+meat+thermometer

 Ingredients

You will need a variety of ingredients, but the basics are bread flour (be sure to buy bread flour), water, milk, eggs, butter or vegetable oil, salt, sugar, active dry yeast, and bread machine yeast.
  
It's a good idea to start with all new, fresh ingredients (especially fresh flour and yeast).  Old flour can lack moisture, and older yeast can be on its way to becoming inactive.  Here is a great page that tells how to test if your yeast is fresh:  http://www.redstaryeast.com/lessons-yeast-baking/yeast-shelf-life-storage/yeast-freshness-test

Also, make sure ALL ingredients are at room temperature (between 77-85 degrees F) unless otherwise noted in the recipe.  Milk can be heated briefly in the microwave until the proper temperature is achieved, and whole eggs can be put in a cup of hot water for 5 minutes to safely bring them to room temperature.  If flour is stored in the refrigerator or freezer, measure out the necessary amount, and let it come to room temperature.  Cream cheese and butter should be softened.  Pumpkin, yams, squash, applesauce, pears, and mashed banana should be at room temperature before using.  Yeast should be stored in the refrigerator or freezer and can be added directly to the recipe without bringing it to room temperature.

If using buttermilk powder, it should be added after the flour.  Adding it directly to the water will cause lumps.

Use large-sized eggs

Baking with grains:  Purchase grains in small quantities and refrigerate to prevent fat from turning rancid.  If stored longer than one month, taste before using.  Cracked wheat, bulgur, and other grains absorb water and can impact the texture of a loaf, so to prevent grains from touching the water, level the flour into the corners of the baking pan, then measure grains on top.

Measuring Ingredients:  Exact measurements are key to successful bread baking.  With wet ingredients, use ONLY measuring cups with cups/ounces marked clearly on the side.  After filling the measuring cup, place it on a flat surface and view it at eye level to make sure the amount of liquid is exact.

With dry ingredients, always "level off" the measurement with the back of a knife to make sure the measurement is exact.  Never use the measuring cup to scoop the ingredients (like flour).  Fill the measuring cup with a spoon, then tap the side of the cup with a knife to remove air pockets.  Level off the measuring cup with a knife.

Order of adding ingredients:  Putting ingredients into the bread maker in the EXACT order given in the recipe is very important.  Follow your bread machine's instructions, but generally, this means:

FIRST, liquid ingredients
SECOND, dry ingredients
LAST, yeast

Before adding yeast, use your finger to form a well (hole) in the flour where you will pour the yeast.  In a bread machine, yeast must not come into contact with a liquid when you are adding ingredients.  Yeast should also not come in contact with salt before mixing, as salt will kill it. Cinnamon and garlic also inhibit rising and should be kept away from the yeast.

Checking Dough Consistency

 Many bread recipe books recommend helping the beginning 5-minute mix (knead) by scraping down the sides with a silicone spatula. All you have to do is leave the lid up and as the blade is turning, scrape down the sides and help the ingredients mix. 

Because the kneading action of different bread machines varies, it's important to check the consistency of bread dough after the first 3 to 5 minutes of kneading.  

If the dough looks dry and crumbly (see photo below) or forms two or more balls, add additional liquid, 1 teaspoon at a time, until one smooth ball forms.


If the dough has too much moisture and does not form into a ball (see photo below), add additional bread flour, 1 tablespoon at a time, until a ball forms.


Bread dough with the correct amount of flour and liquid will form a smooth ball and circle the pan nicely (see photo below).  Dough with nuts or fruit in it needs to be a bit stickier than regular bread dough in order to help the nuts or fruit stay incorporated in the bread.


If making a bread with fruit in it, this recipe has a helpful tutorial:  http://easyaspiecanbe.blogspot.com/2014/01/cranberry-orange-bread-recipe-and.html

Raising Dough for Oven-Baking

When using the dough cycle, you often need to let the shaped dough rise before baking.  For best results, a warm, draft-free area where the temperature is between 80-85 degrees is ideal.  I use my unheated oven.  Place the oven's lower rack in the lowest position and set a large pan of hot water on the rack.  Cover the shaped dough loosely with a dampened feed sack towel, and place it on the top rack of the oven.  (You can find these towels at Wal-Mart:  http://www.walmart.com/ip/Aunt-Martha-s-Dish-Towel-White/24660651)  Close the door and let the dough rise until nearly doubled, using the time suggested in the recipe as a guide.  Remove the dough and the water and preheat the oven.

Storing Bread

Remove hot bread from the machine as soon as it is done, and remove the bread from the pan following the manufacturer's directions.  Allow bread to cool for 15 minutes before slicing.  Once bread is completely cooled, wrap in plastic wrap or place it in a plastic bag.  Store it in a cool, dry place for up to three days.  


Sources

Better Homes and Gardens Best Bread Machine Recipes.  Des Moines, Iowa:  Meredith Corporation, 1997.

Oster 2lb Expressbake Breadmaker.  Boca Raton, Florida:  Sunbeam Products, Inc. doing business as Jarden Consumer Solutions, 2009.

Washburn, Donna and Heather Butt.  300 Best Bread Machine Recipes. Toronto, Ontario: Robert Rose, Inc., 2010