Friday, December 26, 2014

Feta Cheese Ball


 Feta, cream cheese, and bacon blend together to create a savory twist on a classic.  Feta Cheese Ball is perfect to serve for any occasion.


Feta Cheese Ball

2 (8 oz.) packages cream cheese, softened
1/2 cup crumbled feta cheese
2 tsp. ranch salad dressing and seasoning mix
1/4 cup grated Parmesan cheese
1/4 cup crumbled, cooked bacon (4-5 strips)
1 tsp. dill weed
Club crackers

In a large bowl on medium speed, beat cream cheese until fluffy.  Beat in feta cheese and dressing mix.  Put into freezer until slightly firm--about 15 minutes.  While mixture is chilling, combine the Parmesan cheese, bacon, and dill weed in a small bowl.  After cheese mixture has chilled for 15 minutes, shape into a ball, and roll cheese ball in Parmesan mixture.  Cover with plastic wrap and refrigerate for at least 1 hour or until firm.  Serve with crackers. 


Friday, December 19, 2014

Cherry Cheese Pie


Cherry Cheese Pie is a simple, easy, delicious pie.  It is a family favorite and perfect for Christmas, Valentine's Day, the Fourth of July...anytime!


Cherry Cheese Pie

1 (8 oz.) package cream cheese, softened
1 (14 oz.) can sweetened condensed milk
1/3 cup lemon juice
1 tsp. vanilla
1 (21 oz.) can cherry or blueberry pie filling, chilled
1  9-inch graham cracker crust

In a large mixer bowl, beat cream cheese on medium speed until fluffy.  Beat in sweetened condensed milk a little at a time until smooth.  Beat in lemon juice and vanilla.  Pour into the crust and chill 3 hours or until set.  Top with desired amount of pie filling before serving.  Keep refrigerated. 


Mini pies can be made using 4 (9 or 10 oz.) ramekins.  Use 1/4 of the graham cracker crust mixture for each mini pie. Pat in bottom and up sides, and bake as directed until crusts are lightly browned.   Cool, and then continue with the Cherry Cheese Pie recipe dividing filling evenly into each ramekin and topping with desired pie filling:


Saturday, December 13, 2014

Peppermint Candy Ice Cream Pie


Peppermint Candy Ice Cream Pie is delicious, has few ingredients, can be made ahead of time, and the best part...is so easy!  What a beautiful dessert for your holiday table!


Peppermint Candy Ice Cream Pie

1 pint vanilla ice cream
1 (8 oz.) container frozen whipped topping, partially thawed
12 peppermint candies, crushed
3 drops red food coloring
1 9-inch Oreo cookie crust
Garnish:  1 (8 oz.) container frozen whipped topping, thawed
                chopped peppermint candies 

Combine ice cream, half of partially thawed whipped topping (4 oz.), and crushed candies.  Stir in red food coloring.  Spoon mixture into prepared pie crust; cover and freeze 4 hours.  Garnish with desired amount of thawed whipped topping and chopped peppermint candies.  Serve immediately or freeze until ready to serve.  Store in freezer.

Click here for printable format 

Oreo Cookie Crust:   http://easyaspiecanbe.blogspot.com/2014/12/oreo-cookie-crust.html


Friday, December 12, 2014

Oreo Cookie Crust


You know that any pie recipe that calls for an Oreo crust is going to be good.  You can make one almost as cheaply as you can buy one, plus a homemade crust is so much better (and prettier!) than one bought from a store.  And don't forget the added bonus of getting to eat an Oreo or two while making it.


Oreo Cookie Crust

18 Oreo cookies, finely crushed
3 tbsp. butter, melted

Finely crush Oreos (I use my food processor), and mix with melted butter. Press crumb mixture onto bottom and sides of a 9-inch pie plate sprayed with cooking spray. Refrigerate until ready to fill.  

Click here for printable format 

 Baking Tip for Easily Removing a Piece of Crumb-Crust PieJust before serving, rub the outside of the filled pie plate with a warm, damp towel.  This softens the butter in the crust, making it less likely to stick to the pie plate.  To prepare the towel, rinse it in very hot water, then wring it well.


Friday, December 5, 2014

Microwave Peanut Brittle Recipe and Tutorial


Microwave Peanut Brittle is crunchy, buttery, and tastes wonderfully of roasted peanuts.  It's so easy; you don't even need a candy thermometer.  Be prepared for it to be requested every holiday season.


Microwave Peanut Brittle

1 cup sugar
1/2 cup light corn syrup
1/8 tsp. salt
1 1/2 cups shelled raw peanuts
1 tbsp. butter
1 1/2 tsp. baking soda
1 teaspoon vanilla

Grease baking sheet heavily with butter (additional butter...not the butter used in the recipe).  Combine sugar, corn syrup, and salt in a 2.5 quart microwave-safe (glass or Pyrex) mixing bowl.  Stir in peanuts.  Microwave at HIGH (100%) until light brown approximately 7-9 minutes.  With a wooden spoon, stir once or twice during cooking.

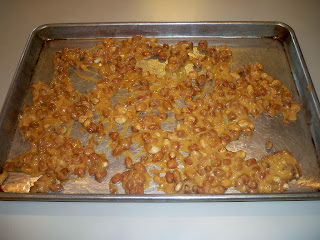
Stir in remaining ingredients until light and foamy (will only take a few seconds).  Quickly spread on buttered baking sheet.  Spread as thinly as possible.  Cool; break into pieces.

Click here for printable format 

Microwave Peanut Brittle 101:

Give this recipe a trial run before making it for others to gauge how quickly your microwave will cook the mixture as microwave ovens vary. I have a new microwave (1000 watts), and it takes 8 minutes.  If your microwave's wattage is the same as mine, try 8 minutes for your first batch.  If it has a higher wattage, cook for less time, and if it has a lower wattage, cook for more time.  If, after the candy completely cools, it is a bit chewy and/or pale, you'll know you need to microwave it a bit longer next time.  If it tastes like it cooked too long, you'll know to scale back the time.  If it's only slightly under- or overcooked, increase or decrease your time by 10 seconds.  This peanut brittle will stay fresh in a zippered storage bag for several weeks.

 I use a sandwich bag to spread the butter on the baking sheet.  I cover the entire bottom of the sheet with butter:


Measure all ingredients before starting:


Mix the sugar, corn syrup, and salt with a wooden spoon because of the candy's eventual high temperature.  For the same reason, use a microwave-safe mixing bowl that can withstand the high temperature.  Glass or Pyrex bowls work well. The mixture will be very thick and difficult to mix.  Stir in the peanuts:


Microwave at HIGH (100%) until light brown approximately 7-9 minutes.  With a wooden spoon, stir twice during cooking.  Here is the mixture at the first and second stirs:


Stir in remaining ingredients until light and foamy (will only take a few seconds):


 Quickly spread on buttered baking sheet with two metal spoons.  They work much better than wooden spoons for this purpose.  Spread as thinly as possible.  Mixture will continue to look foamy until it starts to harden.  Don't worry about getting every smidgen of candy out of the bowl and onto the baking sheet. The most important thing is getting the candy spread quickly before it starts to harden.


Soak the bowl and spoons in the hottest tap water you have.  The candy stuck to the bowl will eventually dissolve:


Cool and break into pieces.  If needed, I use a metal spatula to loosen sections.  Enjoy!


Friday, November 28, 2014

Slow Cooker Easy Chicken Pot Pie


I made a version of Easy Chicken Pot Pie for years, but I had to cook the chicken first, and then the filling was baked in the oven.  A friend turned me on to her recipe made in the slow cooker, and I have never looked back.


Slow Cooker Easy Chicken Pot Pie

3 or 4 boneless, skinless chicken breasts (thawed if frozen)
1 (16 oz.) pkg. frozen mixed vegetables
1 (4 oz.) can mushrooms, drained (opt.)
2 (10.5 oz.) cans condensed cream of chicken soup, undiluted
1/2 tsp. poultry seasoning
salt and pepper to taste
6 Pillsbury Grands Southern-Style Frozen Biscuits

Place chicken breasts in a 3.5 qt. slow cooker.  Combine rest of ingredients (except biscuits) and cover breasts.  Cook on low 6-8 hours or until chicken reaches 165 degrees.  Before serving, remove breasts from slow cooker.  Shred, and return the meat to the mixture.  Serve on top of baked biscuits.

Click here for printable format 

 I adapted this recipe from the original recipe shared with me by my friend Constance.

Friday, November 21, 2014

Cranberry Relish and Tutorial


Cranberry Relish is the best cranberry salad I have ever eaten.  Made with cherry gelatin, it has a delicious flavor that compliments turkey or ham and all the trimmings of a holiday dinner.  As an added bonus, it is made a day or two ahead of your holiday feast making it very convenient to serve.

3/4 cup sugar not shown.

Cranberry Relish

1 (12 oz.) package of cranberries, rinsed and drained
2 cups + up to 3/4 cup sugar (divided)
1 (3 oz.) package cherry gelatin
1 cup boiling water
2/3 cup chopped pecans

Using a food processor, grind cranberries.  In a 2 qt. bowl, combine the ground cranberries with 2 cups of sugar.  Stir thoroughly and let set out all day or night so berries can absorb the sugar.  (I usually prepare mine in the evening, and after they have set out awhile, I put them in the refrigerator overnight until I am ready for them the next day.)  The next day, taste berries to see if additional sugar is needed, and if so, add up to 3/4 cup; stir.  Dissolve cherry gelatin in 1 cup boiling water.  Let cool to room temperature, and then stir it into the berries.  Refrigerate.  When partially congealed (about 45 minutes to an hour), stir in the chopped pecans and transfer to a pretty serving dish.  Refrigerate overnight.

Click here for printable format 

This recipe is an old family recipe handed down to me by my mom. She used a food grinder that attached to the counter with a vice to grind the cranberries.  Growing up, she served this relish every Thanksgiving.

Cranberry Relish 101:

Using a food processor, grind cranberries:


 Here is the berry/sugar mixture after it has set out overnight:


When partially congealed (about 45 minutes to an hour), stir in the chopped pecans.  The salad should be congealed enough that the pecans will sit on top of the salad when added:


Transfer to a pretty serving dish, refrigerate overnight, and then serve!  Enjoy!


Friday, November 14, 2014

Herb Roasted Turkey


The herb butter used in this recipe takes roasted turkey to a whole new level.  It is so juicy and full of delicious flavor.

Flour and Reynolds Oven Bag, Turkey Size, not pictured.

Herb Roasted Turkey

1 Reynolds Oven Bag, Turkey Size
1 tbsp. flour
2 ribs celery, sliced
1 medium onion, sliced
12 to 24 pound turkey, thawed
1 stick plus 2 tbsp. melted butter 

Preheat oven to 350 degrees.  Shake flour in Reynolds Oven Bag; place in roasting pan at least 2 inches deep.  Add celery and onion to oven bag.  Remove neck and giblets from turkey.  Lightly stuff with your favorite stuffing recipe, if desired.  Inject melted butter everywhere into the turkey--the breast, legs, thighs, etc.

Herb Butter:
2 sticks butter, softened  
1/2 cup (heaping) chopped fresh parsley
6-8 cloves garlic, minced or 3 1/2 tsp. jarred minced garlic
1 tsp. seasoned salt
1 tsp. onion powder
1 tsp. black pepper
Kosher salt

Combine the softened butter, chopped parsley, minced garlic, seasoned salt, onion powder, and black pepper in a medium bowl. Using your hands works well for this.  From the tail portion of the bird, place a spatula or your hand between the skin on the breast and the meat. Coat under the skin with the herb butter. Using your hands, spread the rest of the herb butter on top of the turkey's skin and inside the cavity, as well. Sprinkle with Kosher salt.  Place turkey in oven bag on top of vegetables.

Close oven bag with nylon tie; cut six 1/2-inch slits in top.  Tuck ends of bag in pan.  Bake 2 to 2 1/2 hours for a 12 to 16 lb. turkey, 2 1/2 to 3 hours for a 16-20 lb. turkey, and 3 to 3 1/2 hours for a 20 to 24 lb. turkey, or until thermometer inserted into thickest part of the inner thigh, not touching the bone, reads 180 degrees.  Add 1/2 hour for stuffed turkey.  Thermometer inserted into middle of the stuffing should read 165 degrees.  Let stand in oven bag for 30 minutes.  If turkey sticks to bag, gently loosen bag from turkey before opening bag.

Click here for printable format 

*Herb Butter recipe and application method from mrshappyhomemaker.com:  http://www.mrshappyhomemaker.com/2013/11/herb-roasted-turkey/

Video of how to carve a turkey (easy method):  https://www.youtube.com/watch?v=iAe7-GpV98E

My dad was always in charge of the Thanksgiving turkey.  He would inject it with melted butter and salt it before roasting, and I thought it was the best turkey ever.  I have followed food blogger Mrs. Happy Homemaker for years, and when I saw her Herb Roasted Turkey recipe, I knew I had to try it combined with my dad's method.  It lives up to everything she promises, and her step-by-step photos are very helpful.  Please click on the herb butter link above to see her application photos.


Friday, November 7, 2014

Slow Cooker Mac and Cheese


I grew up on the blue box macaroni and cheese and continued to make it all of my adult life.  A few years ago, I decided to start making my own mac and cheese but never found a recipe with the right amount of cheesiness and zing until this one, which several of my friends swore by.  If you'd like to make the leap to homemade and are looking for an easy, foolproof recipe...this is it. You might never make another blue box again.

2 8-oz. blocks of sharp cheddar cheese are shown, but one should provide enough cheese for this recipe.


Slow Cooker Mac & Cheese

2 cups uncooked elbow macaroni 
1/2 cup sour cream
1 (10.75 oz) can condensed cheddar cheese soup
1/2 tsp. salt
1 cup milk
1/2 tsp. dry mustard
1/2 tsp. black pepper
4 tbsp. butter
2 1/2 cups grated sharp cheddar cheese

Spray a 6 qt. slow cooker with nonstick cooking spray.  If using a slow cooker with a nonstick insert, omit this step.  Boil the macaroni in water according to the package instructions until still slightly firm (al-dente--not overly cooked); drain. You don't want to overcook your macaroni!
 
In a medium bowl, combine the sour cream, soup, salt, milk, mustard and pepper; set aside.  In a saucepan, melt butter over medium heat. Add cheese and stir until it melts. 

In your slow cooker, combine the cheese mixture and the soup mixture. Add drained macaroni and stir well.

Cook for 1 1/2 to 2 1/2 hours* on LOW stirring occasionally just until it's hot and creamy.  Once it reaches that stage, turn your slow cooker on warm until ready to serve.

   
*NOTE: These are approximate times; slow cookers can vary widely in how hot and quickly they cook, so you may need to make adjustments.

**Recipe adapted from julieseatsandtreats.com:  http://www.julieseatsandtreats.com/2013/04/crock-pot-mac-cheese/2/


Friday, October 31, 2014

The Best Meatloaf...Ever


Many years ago, a young man, who worked for us, would often request this meatloaf.  He always said, "This is the best meatloaf ever!" ♥


The Best Meatloaf...Ever

1 (8 oz.) can tomato sauce plus enough ketchup to equal 1 1/4 cups
2 pounds lean ground beef
1 cup quick or old-fashioned oats
2 eggs, beaten
1/3 cup finely chopped onion
1 1/2 tsp. salt

Topping:
1/3 cup ketchup
1/3 cup brown sugar
---------------------------
Or plain ketchup can be used for the topping

Pour the can of tomato sauce into a 2-cup liquid measuring cup and add enough ketchup to equal 1 1/4 cups.  Combine all ingredients except topping.   Pat mixture into an ungreased 7x11 baker.*  Bake at 350 degrees for 45 minutes.  Combine topping ingredients, spread over meatloaf, and bake for an additional 5 minutes.

*6 (9 or 10 oz.) ramekins can be used.  (See bottom photo below.)  Use a meat thermometer to determine when they reach a well-done reading (170 degrees).  They usually take 35 minutes at 350 degrees; then spread on the topping and bake for another 5 minutes.

Click here for printable format 

Note:  I prefer to use 85/15 ground beef, because I think it has more flavor than leaner ground beef.  I use a turkey baster to remove the grease in the bottom of the baker along the sides before spreading on the topping.


Mini meatloaves created in ramekins:


Friday, October 24, 2014

Tuna Noodle Casserole


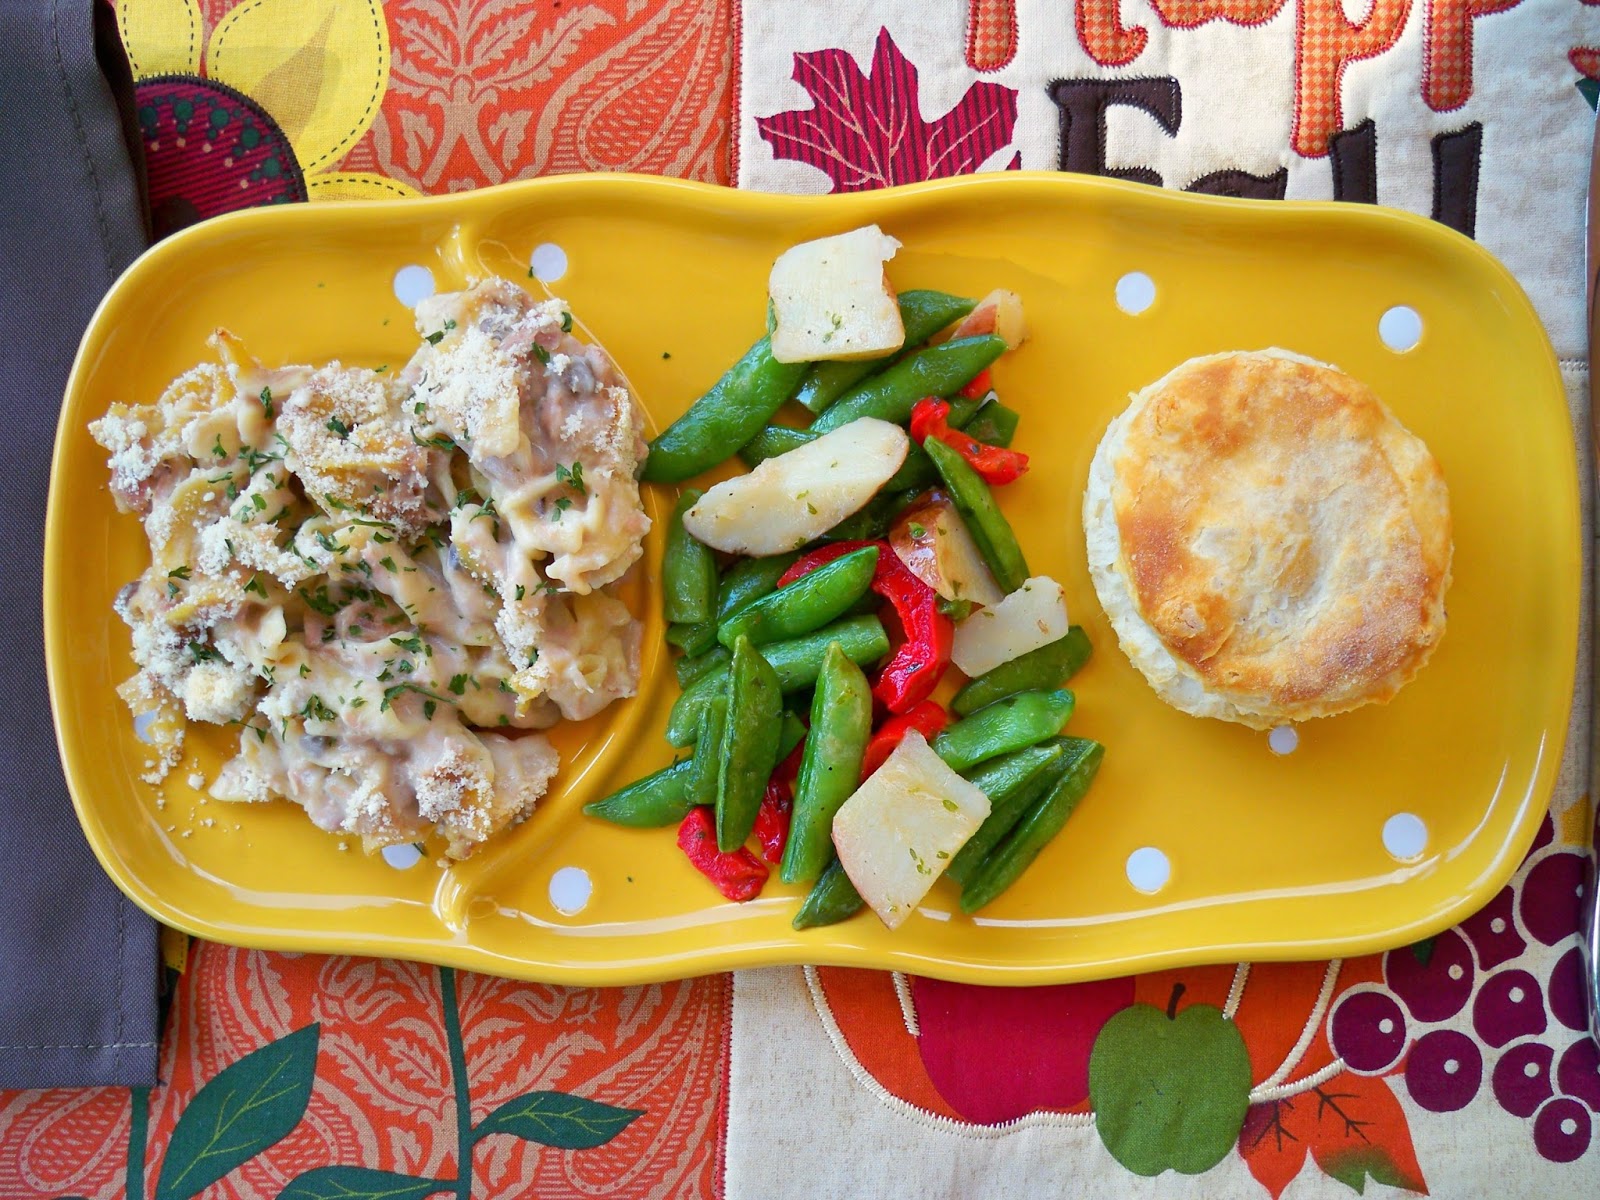
You can't get more basic than Tuna Noodle Casserole.  The Parmesan cheese topping is a perfect finishing touch to a dish that can be ready in an hour.


Tuna Noodle Casserole

3 cups medium egg noodles, cooked and drained
1 cup chopped celery (opt.)
1/4 cup chopped onion
2 tbsp. butter or margarine
2 tbsp. flour
1 (10.5 oz.) can condensed cream of mushroom soup
3/4 cup milk
2 (5 oz.) cans tuna, drained and flaked
1/4 cup chopped pimiento (opt.)
Salt to taste
1/4 cup grated Parmesan cheese 

Preheat oven to 375 degrees.  In a large saucepan (I use a 5 qt. Dutch oven), cook celery and onion in butter or margarine till tender but not brown.  Stir in the flour; stir in condensed soup.  Gradually stir in milk. Cook and stir till mixture is thickened and bubbly.  Stir in the tuna, pimiento, and the cooked and drained noodles.  Thin mixture with additional milk if needed.  Salt to taste.

Turn noodle mixture into a 1.5 qt. ungreased casserole.  Sprinkle the Parmesan cheese over top of mixture.  Bake, uncovered, in a 375 degree oven for 20 to 25 minutes.  Garnish with parsley if desired. 


If made with fat-free soup and skim milk, each serving has:


Friday, October 10, 2014

Mike's Chili


This chili, alone, was reason enough to marry my husband.  After tasting Mike's, he was in charge of the chili-making from then on.

Salt not pictured.


Mike's Chili

2 lbs. ground beef
1 cup chopped onions
2 (8 oz.) cans tomato sauce
1 (2 oz.) pkg. Williams Original Chili Seasoning (seasons 4 lbs. meat)
2-4 tsp. (to taste) chopped, canned green chilies
1 (14.5 oz.) can diced tomatoes, undrained
1 (14.5 oz.) can whole tomatoes, undrained
2 (15 oz.) cans black beans, undrained
2 (15.5 oz.) cans kidney beans, undrained
2 (15.5 oz.) cans pinto beans, undrained (or 1 30 oz. can)
Salt to taste

In a large stock pot (We use an 8-qt.), brown ground beef and onion over medium heat; drain.  Stir in tomato sauce, chili seasoning (to taste--we use the whole package, but less can be used with more added later), green chilies (We use 2 tsp.), diced tomatoes, and whole tomatoes (break up slightly before adding).  Simmer for about an hour on medium-low.  Add beans and simmer for 2-4 hours.  Salt to taste.