Friday, March 27, 2015

Coconut Cream Pie


My husband has a friend at work who says this is the best coconut cream pie he's ever had.  With praise like that, who can blame me for occasionally sending my husband and him a whole pie to share? ♥

Whipped cream ingredients and toasted coconut not pictured.
Coconut Cream Pie

3/4 cup sugar
1/4 cup cornstarch
1/4 tsp. salt
3 cups whole milk
4 egg yolks, beaten
3 tbsp. butter
1 1/2 tsp vanilla
1 cup coconut
1 (9") baked pie shell
Whipped cream and toasted coconut

In a medium (3 qt.) saucepan, combine sugar, cornstarch and salt. Gradually stir in milk. Cook and stir over medium heat till thickened and bubbly. Reduce heat; cook and stir 2 minutes more. Remove from heat. Gradually stir 1 cup of the hot mixture into the yolks. Return egg mixture to saucepan; bring to a gentle boil. Cook and stir for 2 minutes more. Remove from heat, and stir in the butter, vanilla, and coconut. Pour into the pie shell. Chill for 3-4 hours before topping with whipped cream and toasted coconut.


Toasted Coconut:  Preheat oven to 325 degrees.  Spread desired amount of coconut on a baking sheet and bake until light brown (about 10-15 minutes).  Stir every two - three minutes.  Cool and sprinkle over whipped cream after topping pie.


Friday, March 20, 2015

Crock Pot Ravioli


Slow Cooker Ravioli is easy, delicious, and satisfying...perfect for a busy day!


Crock Pot Ravioli


Brandie of The Country Cook has many delicious, easy recipes.  The recipe for Crock Pot Ravioli can be found on Brandie's website The Country Cook:  http://www.thecountrycook.net/2014/12/crock-pot-ravioli.html

Notes:

*I only use 1 (25 oz.) bag frozen ravioli (cheese or beef).

*I use 3/8 tsp. pepper and a slightly rounded 1/2 tsp. of salt.

Click here to print!


Friday, March 6, 2015

Corned Beef and Cabbage


Braised corned beef is deliciously tender, and potatoes and carrots added during the last hour of cooking are richly flavored by the corned beef broth.  Buttery, steamed cabbage completes the perfect St. Patrick's Day meal.

Butter and pepper not shown.


Corned Beef and Cabbage

1 (around 3 lbs.) flat cut corned beef brisket
3 tbsp. butter
1 medium yellow onion, sliced
1+ cup(s) beef broth, beer, or dry white wine
Red potatoes (1/2 of a 5 lb. bag)
Baby carrots (1/2 of a 16 oz. bag)
Small head of cabbage
Butter, softened
Freshly ground black pepper 

Preheat oven to 325 degrees.  Over medium heat, melt the 3 tbsp. of butter in a Dutch oven or oven-safe stock pot.  (I use an 8 qt. stock pot.)  Add onion and saute until translucent.  Meanwhile, unwrap the brisket, set spice packet aside, and rinse the brisket with cool water.  Pat dry.  Trim as much fat as you can from the brisket, and rub the seasonings from the spice packet all over the meat.  Put the brisket on top of the onions, and pour about a cup of liquid (beef broth, beer, or dry white wine) over the meat.  Bring to a simmer.  Cover tightly and put in preheated oven.  Check occasionally to see if more liquid is needed. Bake until fork slips easily in and out of meat--about 3 1/2 hours.  Brisket should measure at a minimum temperature of 170 degrees.  

While brisket is baking, cut the potatoes in half (or fourths if large).  Add potatoes and carrots to the brisket.  For firm vegetables, add during the last 45 minutes of cooking.  For soft vegetables, add during the last hour to hour and 15 minutes of cooking.  When brisket and vegetables are done, remove from heat and let rest, covered, for about 20 minutes.

Cut the head of cabbage into quarters.  Then cut each fourth in half to create 8 thin wedges.  Leave the core intact as it helps hold the wedges together.  Spread softened butter on the cut side of the wedges, and sprinkle with freshly ground black pepper.  Place wedges in a steamer basket; place over, but not touching, boiling water.  Cover; reduce heat, and steam until tender--about 15-20 minutes.


This recipe was shared with me by my friend Gayle who is a personal chef.  My friend Kate has cooked many a corned beef brisket and gave me a lot of good advice, as well! ♥ 

NOTE:  Many times, I add the whole bag of carrots and 3/4 of the bag of potatoes.  I add those and 2 more cups of beef broth when there is an hour and a half left of cooking.

Cooking Tip:   When slicing or chopping onions, put your cutting board on the stove and turn on the overhead vent or microwave ventilation fan.  This will redirect the onion fumes away from your eyes resulting in no more tears! 


Friday, February 20, 2015

Banana Bread


What could be easier than making banana bread in the bread machine? The most difficult part of this delicious recipe is waiting for the bread to be done. 


 Banana Bread

1/2 cup milk (between 77-85 degrees F)
1 cup mashed ripe bananas
2 eggs
1/2 tsp. salt
1 cup sugar
1/2 cup vegetable or canola oil
2 1/4 cups bread flour
2 tsp. baking powder
1 tsp. baking soda
1/2 cup chopped nuts (opt.)

1. Measure ingredients including nuts into baking pan in the order recommended by the manufacturer. Insert pan into the machine. Select "Quick" or "Cake" cycle.

2. Halfway through mixing time, using a rubber spatula, scrape down sides of baking pan and the kneading blade.

3. When signal sounds indicating the end of the baking cycle, test for doneness with a wooden skewer. If ready, remove baking pan from bread machine. If not, keep in bread machine on "Keep Warm Cycle" for 10-30 minutes or on "Bake Cycle" until baked.

4. Set baking pan on a cooling rack for 10 minutes. Turn bread out onto a serving plate and set aside to cool completely.

*For a moist texture, cool overnight before slicing.

*Some bread machines may require up to 50 minutes on the "Keep Warm Cycle" before the quick bread is baked. For specifications on the length of this cycle, and for information on how to use it, check the user's manual for your bread machine.


Click here for printable format 

*Recipe from Washburn, Donna and Heather Butt.  300 Best Bread Machine Recipes. Toronto, Ontario: Robert Rose, Inc., 2010:  p. 403 


Friday, February 13, 2015

Senate Bean Soup


Navy beans, ham, celery, and butter make Senate Bean Soup rich and delicious. 


Senate Bean Soup

Christy Jordan of Southern Plate has many mouth-watering, simple recipes.  The recipe for Senate Bean Soup can be found on Christy's website:  http://www.southernplate.com/2010/01/shortcut-senate-bean-soup-and-mary-poppins-visits-bountiful.html

Notes:

*I use 1 1/2 to 2 cups of cooked, diced ham.  If I don't have leftover ham in the freezer, I use Farmland Smoked Spiral Ham Slices and Pieces.  I cut off any fat or rind and then dice enough to make 1 1/2 to 2 cups.   The remaining ham can be frozen for the next batch of soup. 

*Use 4 (15.5 oz.) cans navy beans

*Cornbread is a good side with this soup, and I have an easy, delicious recipe for it!

Cornbread:  http://easyaspiecanbe.blogspot.com/2014/02/cornbread.html  

Click here to print! 

From Wikipedia:  "Senate bean soup is a soup made with navy beans, ham hocks, and onion. It is served in the dining room of the United States Senate every day, in a tradition that dates to the early 20th century. The original version included celery, garlic, parsley, and mashed potatoes as well."

Cooking Tip:  For years, I wasted leftover celery, because I didn't know how to store it properly.  I finally stumbled across this technique that will keep celery crisp and fresh for up to 4 weeks!   Wash and dry the celery, trim the edges with a sharp knife, and store it wrapped in a paper towel inside a zippered storage bag in the refrigerator.


Friday, February 6, 2015

French Chocolates


Impress your loved ones with French Chocolates for Valentine's Day.  Easily made in the microwave, these chocolates rival high-end chocolates you can buy at a fraction of the cost.


French Chocolates

1 (12 oz.) package semi-sweet chocolate chips
1 cup ground pecans or walnuts
3/4 cup sweetened condensed milk
1 tsp. vanilla
1/8 tsp. salt
Coating:  coconut, chopped nuts, and/or powdered sugar  

Place chocolate chips in a medium bowl.  Microwave at MEDIUM-HIGH (70%) until melted, 2-4 minutes*, stirring twiceStir in the ground pecans or walnuts, condensed milk, vanilla, and salt.  Cool 5 minutes.  Shape into 1-inch balls.  Dip into desired coating(s).  Place on a greased baking sheet and refrigerate until set.  Store covered at room temperature.

* I have a new microwave (1000 watts), and it takes 3 minutes.

Click here for printable format 

These chocolates can be made in advance and frozen until needed.  

Grinding Nuts 101:  To finely grind the pecans or walnuts used in this recipe, measure 1 1/2 cups of the nuts into your food processor.  Depending on how finely your food processor grinds the nuts, you may need more or less:

 
Pulse for 1-2 seconds at a time checking the texture of the nuts after each pulse.  Pulsing in very brief bursts allows the nuts to fall back down into the container providing for even grinding.  This is the texture you want your nuts to be:


Presentation Idea:  Wal-Mart carries mini baking cups in the Valentine's Day decorations aisle that are perfect for holding these chocolates:


Friday, January 30, 2015

Blueberry Muffin Bread


If you like blueberry muffins and have a bread machine, you should try Blueberry Muffin Bread.  I used to buy Sara Lee's Blueberry Crumble Bread, but this recipe gives it a run for its money.

Only 1 tsp. of yeast is needed.


Blueberry Muffin Bread

3/4 cup milk (between 77-85 degrees F)
1 egg*
3 tbsp. water (between 77-85 degrees F)
2 tbsp. butter (cut in pieces, room temperature)
3 tbsp. sugar
3/4 tsp. salt
1/4 tsp. ground nutmeg
1/3 cup dried blueberries**
3 cups bread flour
1 tsp. active dry yeast or bread machine yeast

 1. Measure all ingredients (even blueberries) into baking pan in the order recommended by the manufacturer. Insert pan into the bread machine.

2. Select Basic or White Bread Cycle, 1.5-pound setting, and medium crust setting.

3. Remove immediately from baking pan when done and let cool 15 minutes before slicing.


*Your egg should be room temperature.  A safe way to achieve this is to place the egg in a cup of hot water for 5 minutes.

**Look for dried blueberries that are fresh and soft, because you want the blueberries to break up during mixing.  The best I've found is the Mariani brand available at Wal-Mart.

Note:  This makes great toast.  After the first day or two, I slice the rest of the loaf and lay the slices side-by-side on baking sheets. I freeze the slices (don't even have to bother covering), and when they're frozen, I put them in freezer Ziploc bags. Then I just pull out a piece now and then and pop it in the toaster...no thawing needed. I do have to run it through a couple of toasting cycles, but it tastes like I just made it.


Friday, January 23, 2015

Bacon Cheddar Potato Skins


Once you taste Bacon Cheddar Potato Skins, you will never want to order potato skins at a restaurant again. 


Bacon Cheddar Potato Skins

4 large baking potatoes, baked
1/2 cup plus 1 tbsp. canola oil
3 tbsp. grated Parmesan cheese
1 1/2 tsp. salt
3/4 tsp. garlic powder
3/4 tsp. paprika
3/8 tsp. pepper
8 bacon strips, cooked and crumbled
Shredded sharp cheddar cheese
Sour Cream
4 green onions, sliced

Preheat oven to 475 degrees.  Cut baked potatoes in half lengthwise; scoop out pulp, leaving a 1/4 inch shell.  Place potato skins pulp-side up on a greased baking sheet.

Combine oil, Parmesan cheese, salt, garlic powder, paprika, and pepper; brush over the pulp side of the potatoes. Turn the potatoes over brushing the oil mixture on the bottoms.  Leave them bottom-side up.

Bake at 475 degrees for 7 minutes; turn pulp-side up.  Bake until crisp, about 7 minutes more.  Sprinkle bacon and cheddar cheese inside skins.  Bake 2 minutes longer or until the cheese is melted.  Top with sour cream and green onions.  Serve immediately.


Friday, January 9, 2015

Crunchy Beef Casserole


Crunchy Beef Casserole is great for a filling weeknight meal.  All the ingredients can be kept on hand to have at a moment's notice, and dinner can be on the table in about an hour.

A 6 oz. can of French's French Fried Onions is pictured, but a 2.8 oz. can will be plenty. Salt not pictured.


Crunchy Beef Casserole


Christy Jordan of Southern Plate has many mouth-watering, simple recipes.  The recipe for Crunchy Beef Casserole can be found on Christy's website:  http://www.southernplate.com/2009/07/crunchy-beef-casserole-and-my-casserole-dish-collection.html

Notes:

*Use a 2.8 oz. can of French fried onions.

*I add additional salt to the mixture before baking.

*I use a 7x11 baker.

Click here to print!


Friday, December 26, 2014

Feta Cheese Ball


 Feta, cream cheese, and bacon blend together to create a savory twist on a classic.  Feta Cheese Ball is perfect to serve for any occasion.


Feta Cheese Ball

2 (8 oz.) packages cream cheese, softened
1/2 cup crumbled feta cheese
2 tsp. ranch salad dressing and seasoning mix
1/4 cup grated Parmesan cheese
1/4 cup crumbled, cooked bacon (4-5 strips)
1 tsp. dill weed
Club crackers

In a large bowl on medium speed, beat cream cheese until fluffy.  Beat in feta cheese and dressing mix.  Put into freezer until slightly firm--about 15 minutes.  While mixture is chilling, combine the Parmesan cheese, bacon, and dill weed in a small bowl.  After cheese mixture has chilled for 15 minutes, shape into a ball, and roll cheese ball in Parmesan mixture.  Cover with plastic wrap and refrigerate for at least 1 hour or until firm.  Serve with crackers. 


Friday, December 19, 2014

Cherry Cheese Pie


Cherry Cheese Pie is a simple, easy, delicious pie.  It is a family favorite and perfect for Christmas, Valentine's Day, the Fourth of July...anytime!


Cherry Cheese Pie

1 (8 oz.) package cream cheese, softened
1 (14 oz.) can sweetened condensed milk
1/3 cup lemon juice
1 tsp. vanilla
1 (21 oz.) can cherry or blueberry pie filling, chilled
1  9-inch graham cracker crust

In a large mixer bowl, beat cream cheese on medium speed until fluffy.  Beat in sweetened condensed milk a little at a time until smooth.  Beat in lemon juice and vanilla.  Pour into the crust and chill 3 hours or until set.  Top with desired amount of pie filling before serving.  Keep refrigerated. 


Mini pies can be made using 4 (9 or 10 oz.) ramekins.  Use 1/4 of the graham cracker crust mixture for each mini pie. Pat in bottom and up sides, and bake as directed until crusts are lightly browned.   Cool, and then continue with the Cherry Cheese Pie recipe dividing filling evenly into each ramekin and topping with desired pie filling:


Saturday, December 13, 2014

Peppermint Candy Ice Cream Pie


Peppermint Candy Ice Cream Pie is delicious, has few ingredients, can be made ahead of time, and the best part...is so easy!  What a beautiful dessert for your holiday table!


Peppermint Candy Ice Cream Pie

1 pint vanilla ice cream
1 (8 oz.) container frozen whipped topping, partially thawed
12 peppermint candies, crushed
3 drops red food coloring
1 9-inch Oreo cookie crust
Garnish:  1 (8 oz.) container frozen whipped topping, thawed
                chopped peppermint candies 

Combine ice cream, half of partially thawed whipped topping (4 oz.), and crushed candies.  Stir in red food coloring.  Spoon mixture into prepared pie crust; cover and freeze 4 hours.  Garnish with desired amount of thawed whipped topping and chopped peppermint candies.  Serve immediately or freeze until ready to serve.  Store in freezer.

Click here for printable format 

Oreo Cookie Crust:   http://easyaspiecanbe.blogspot.com/2014/12/oreo-cookie-crust.html


Friday, December 12, 2014

Oreo Cookie Crust


You know that any pie recipe that calls for an Oreo crust is going to be good.  You can make one almost as cheaply as you can buy one, plus a homemade crust is so much better (and prettier!) than one bought from a store.  And don't forget the added bonus of getting to eat an Oreo or two while making it.


Oreo Cookie Crust

18 Oreo cookies, finely crushed
3 tbsp. butter, melted

Finely crush Oreos (I use my food processor), and mix with melted butter. Press crumb mixture onto bottom and sides of a 9-inch pie plate sprayed with cooking spray. Refrigerate until ready to fill.  

Click here for printable format 

 Baking Tip for Easily Removing a Piece of Crumb-Crust PieJust before serving, rub the outside of the filled pie plate with a warm, damp towel.  This softens the butter in the crust, making it less likely to stick to the pie plate.  To prepare the towel, rinse it in very hot water, then wring it well.


Friday, December 5, 2014

Microwave Peanut Brittle Recipe and Tutorial


Microwave Peanut Brittle is crunchy, buttery, and tastes wonderfully of roasted peanuts.  It's so easy; you don't even need a candy thermometer.  Be prepared for it to be requested every holiday season.


Microwave Peanut Brittle

1 cup sugar
1/2 cup light corn syrup
1/8 tsp. salt
1 1/2 cups shelled raw peanuts
1 tbsp. butter
1 1/2 tsp. baking soda
1 teaspoon vanilla

Grease baking sheet heavily with butter (additional butter...not the butter used in the recipe).  Combine sugar, corn syrup, and salt in a 2.5 quart microwave-safe (glass or Pyrex) mixing bowl.  Stir in peanuts.  Microwave at HIGH (100%) until light brown approximately 7-9 minutes.  With a wooden spoon, stir once or twice during cooking.

Stir in remaining ingredients until light and foamy (will only take a few seconds).  Quickly spread on buttered baking sheet.  Spread as thinly as possible.  Cool; break into pieces.

Click here for printable format 

Microwave Peanut Brittle 101:

Give this recipe a trial run before making it for others to gauge how quickly your microwave will cook the mixture as microwave ovens vary. I have a new microwave (1000 watts), and it takes 8 minutes.  If your microwave's wattage is the same as mine, try 8 minutes for your first batch.  If it has a higher wattage, cook for less time, and if it has a lower wattage, cook for more time.  If, after the candy completely cools, it is a bit chewy and/or pale, you'll know you need to microwave it a bit longer next time.  If it tastes like it cooked too long, you'll know to scale back the time.  If it's only slightly under- or overcooked, increase or decrease your time by 10 seconds.  This peanut brittle will stay fresh in a zippered storage bag for several weeks.

 I use a sandwich bag to spread the butter on the baking sheet.  I cover the entire bottom of the sheet with butter:


Measure all ingredients before starting:


Mix the sugar, corn syrup, and salt with a wooden spoon because of the candy's eventual high temperature.  For the same reason, use a microwave-safe mixing bowl that can withstand the high temperature.  Glass or Pyrex bowls work well. The mixture will be very thick and difficult to mix.  Stir in the peanuts:


Microwave at HIGH (100%) until light brown approximately 7-9 minutes.  With a wooden spoon, stir twice during cooking.  Here is the mixture at the first and second stirs:


Stir in remaining ingredients until light and foamy (will only take a few seconds):


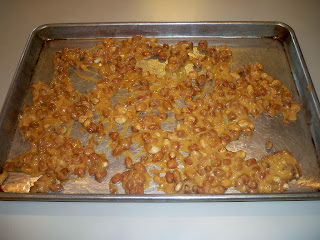
 Quickly spread on buttered baking sheet with two metal spoons.  They work much better than wooden spoons for this purpose.  Spread as thinly as possible.  Mixture will continue to look foamy until it starts to harden.  Don't worry about getting every smidgen of candy out of the bowl and onto the baking sheet. The most important thing is getting the candy spread quickly before it starts to harden.


Soak the bowl and spoons in the hottest tap water you have.  The candy stuck to the bowl will eventually dissolve:


Cool and break into pieces.  If needed, I use a metal spatula to loosen sections.  Enjoy!